A Desktop Extractor is a standalone application that runs on your computer and extracts specific data from websites, PDFs, Excel files, and other documents. Unlike web-based tools, desktop extractors run locally, giving faster performance and zero cloud costs.
Desktop Scrapers offer key advantages over web-based scraper solutions like Outscraper:
-
Zero Infrastructure Costs:
- Runs on the user's machine, eliminating expensive cloud computing fees.
- Lower cloud costs allow you to offer lower pricing, attracting more customers and increasing revenue.
-
Faster Execution:
- Instant execution, no delays for cloud resource allocation.
- Uses the user's system, which is much faster than shared cloud servers.
-
Increased Customer Engagement:
The app sits right on the user's desktop, encouraging frequent use compared to web tools they must actively visit via browser. -
Cross-Platform Deployment in 1 Day:
With Botasaurus, you can launch a desktop scraper for Windows, macOS, and Linux within a day. No need to build a website, manage servers, or handle scaling issues. Bota Desktop includes built-in features such as:- Task management
- Data Table
- Data export (Excel, CSV, etc.)
- Sorting & Filtering
- Caching and many more
With zero usage costs, faster performance, and easier development, Desktop Scrapers outperform web-based alternatives.
Building a Desktop Extractor is easier than you think! All you need is a basic understanding of JavaScript. This guide will walk you through creating two practical extractors:
- Yahoo Finance Stock Scraper – Extracts real-time stock prices from Yahoo Finance.
- Amazon Invoice PDF Extractor – Automates the extraction of key invoice data like Document Number, Document Date, and Place of Supply from Amazon PDFs.
As a web scraper, you might naturally want to focus on web scraping. Still, I want you to create the Amazon Invoice PDF Extractor project. Why? Because many developers overlook the immense potential of extracting data from PDFs, Excel files, and other documents.
Document Data Extraction is a large untapped market. For example, even in most developed countries, accountants often spend hundreds of hours manually entering invoice data for tax filings. A desktop extractor can transform this tedious, error-prone process into a task that takes just minutes, delivering 100% accurate results.
Ready to get started? Let’s dive in!
We'll create two real-world solutions:
-
Yahoo Finance Stock Scraper
This tool scrapes real-time stock prices from Yahoo Finance, demonstrating how to use web scraping tools like Playwright in a desktop app.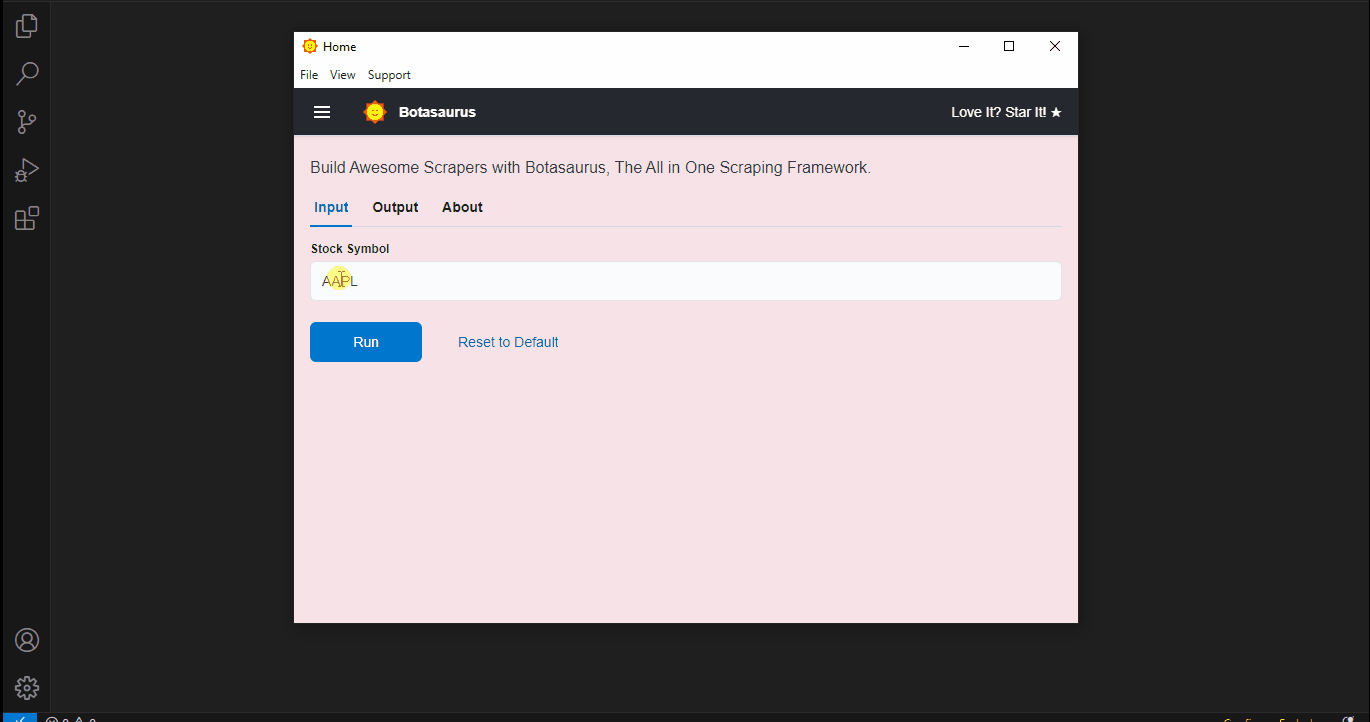
-
Amazon Invoice PDF Extractor
This tool will automate the extraction of key invoice data to save hours of accountants' time:- Document Number
- Document Date
- Place of Supply
- GST Identification No
Follow these simple steps to get started:
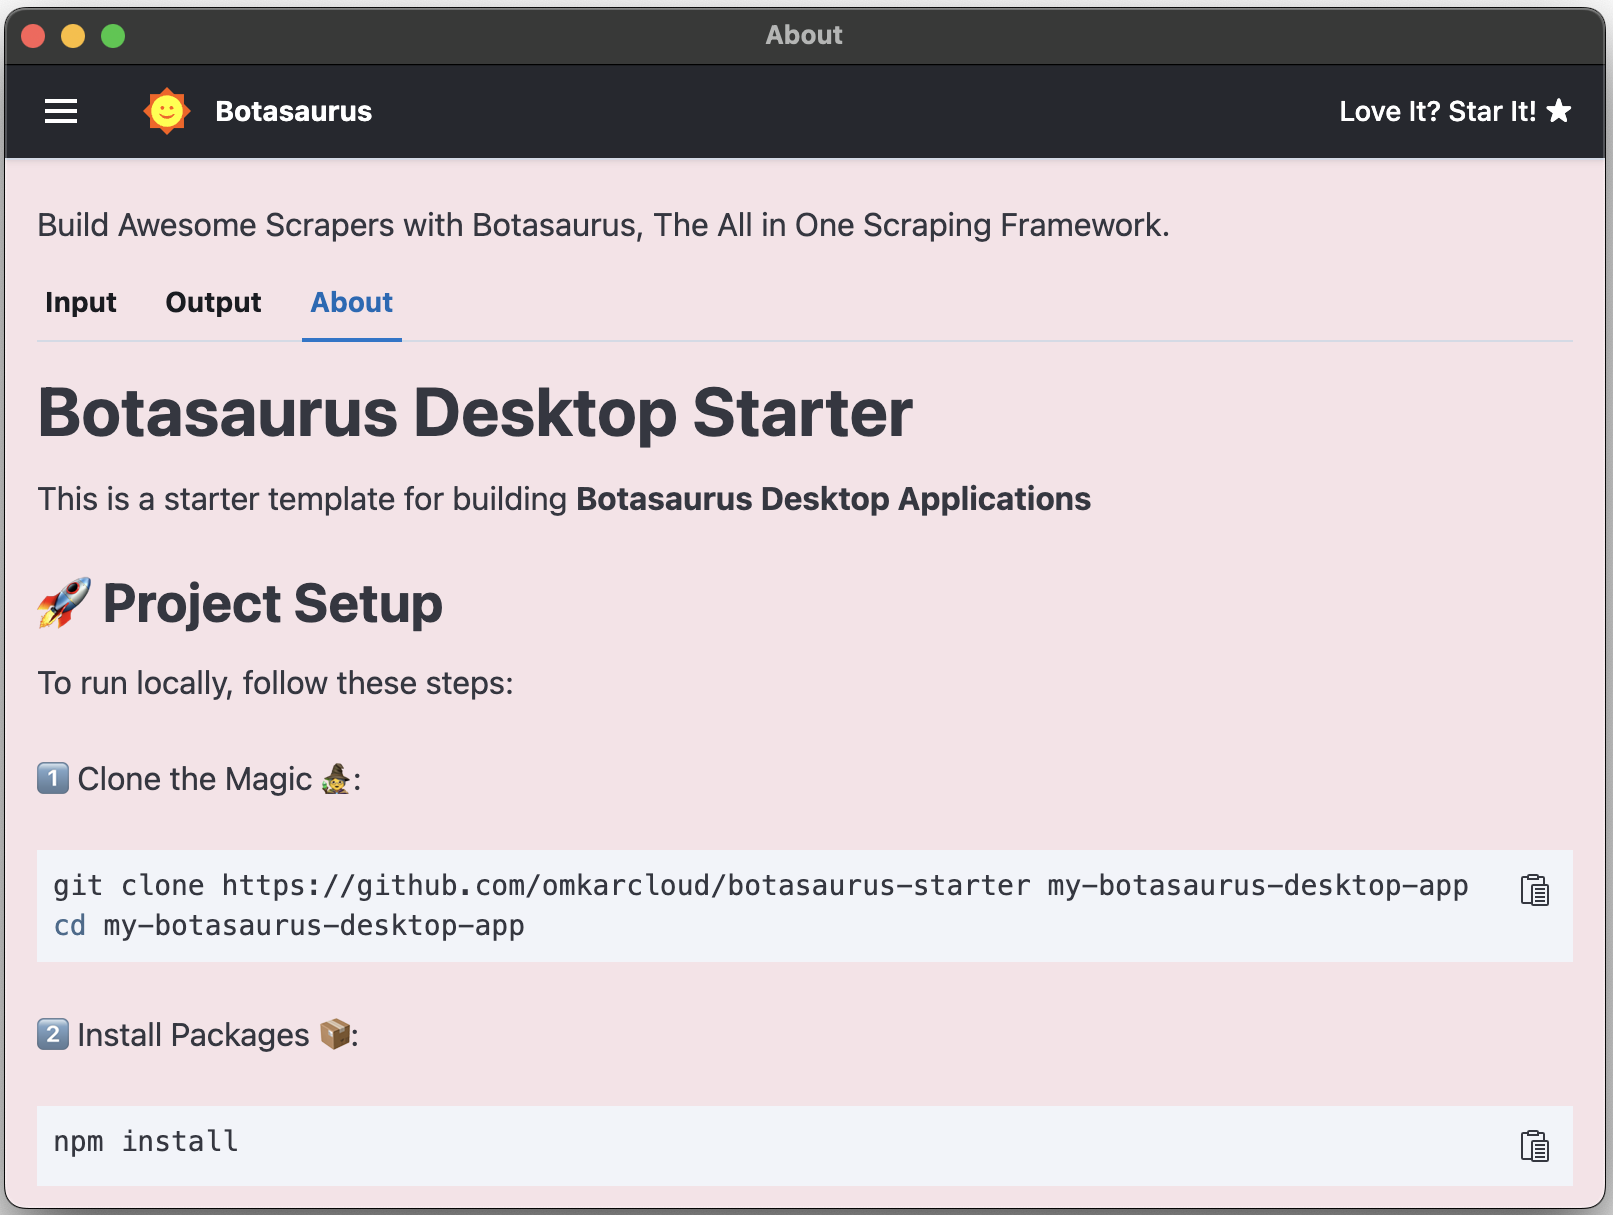
1️⃣ Clone the Magic 🧙♀️:
git clone https://github.com/omkarcloud/botasaurus-starter my-botasaurus-desktop-app
cd my-botasaurus-desktop-app
2️⃣ Install Packages 📦:
npm install
3️⃣ Launch the App 🚀:
npm run dev
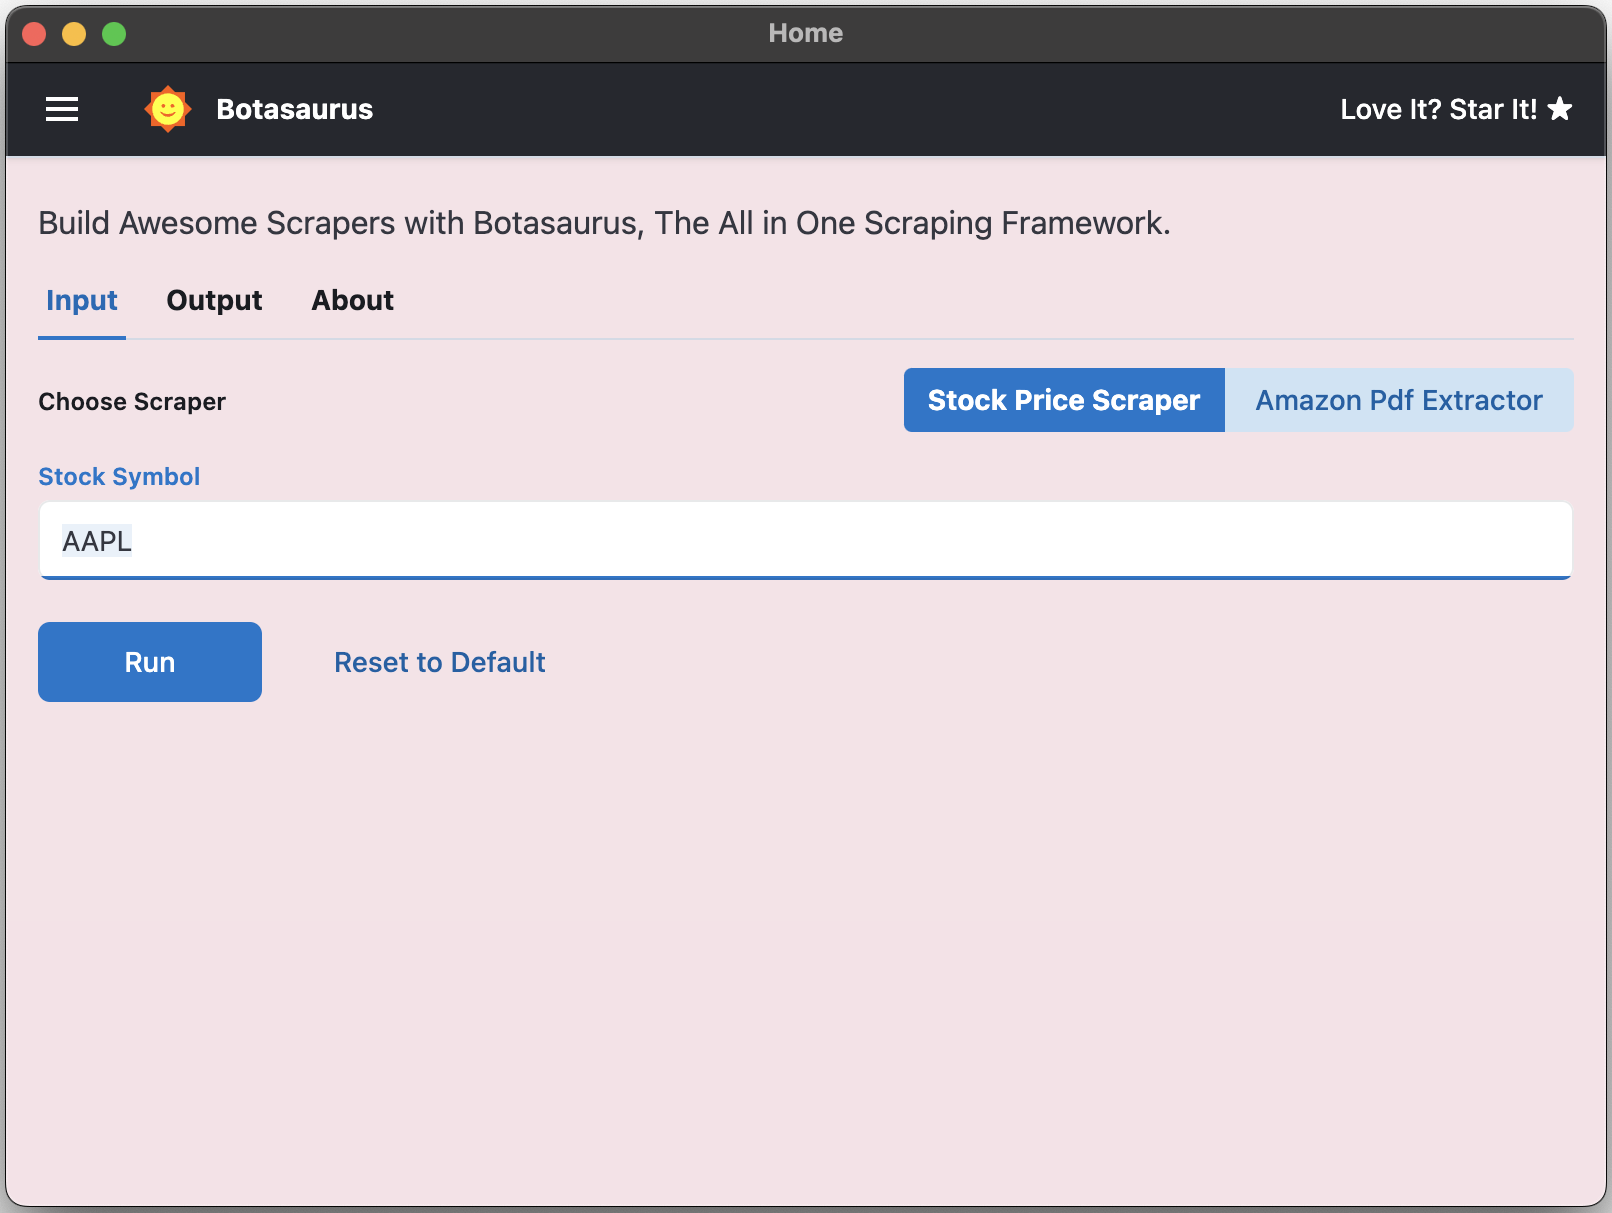
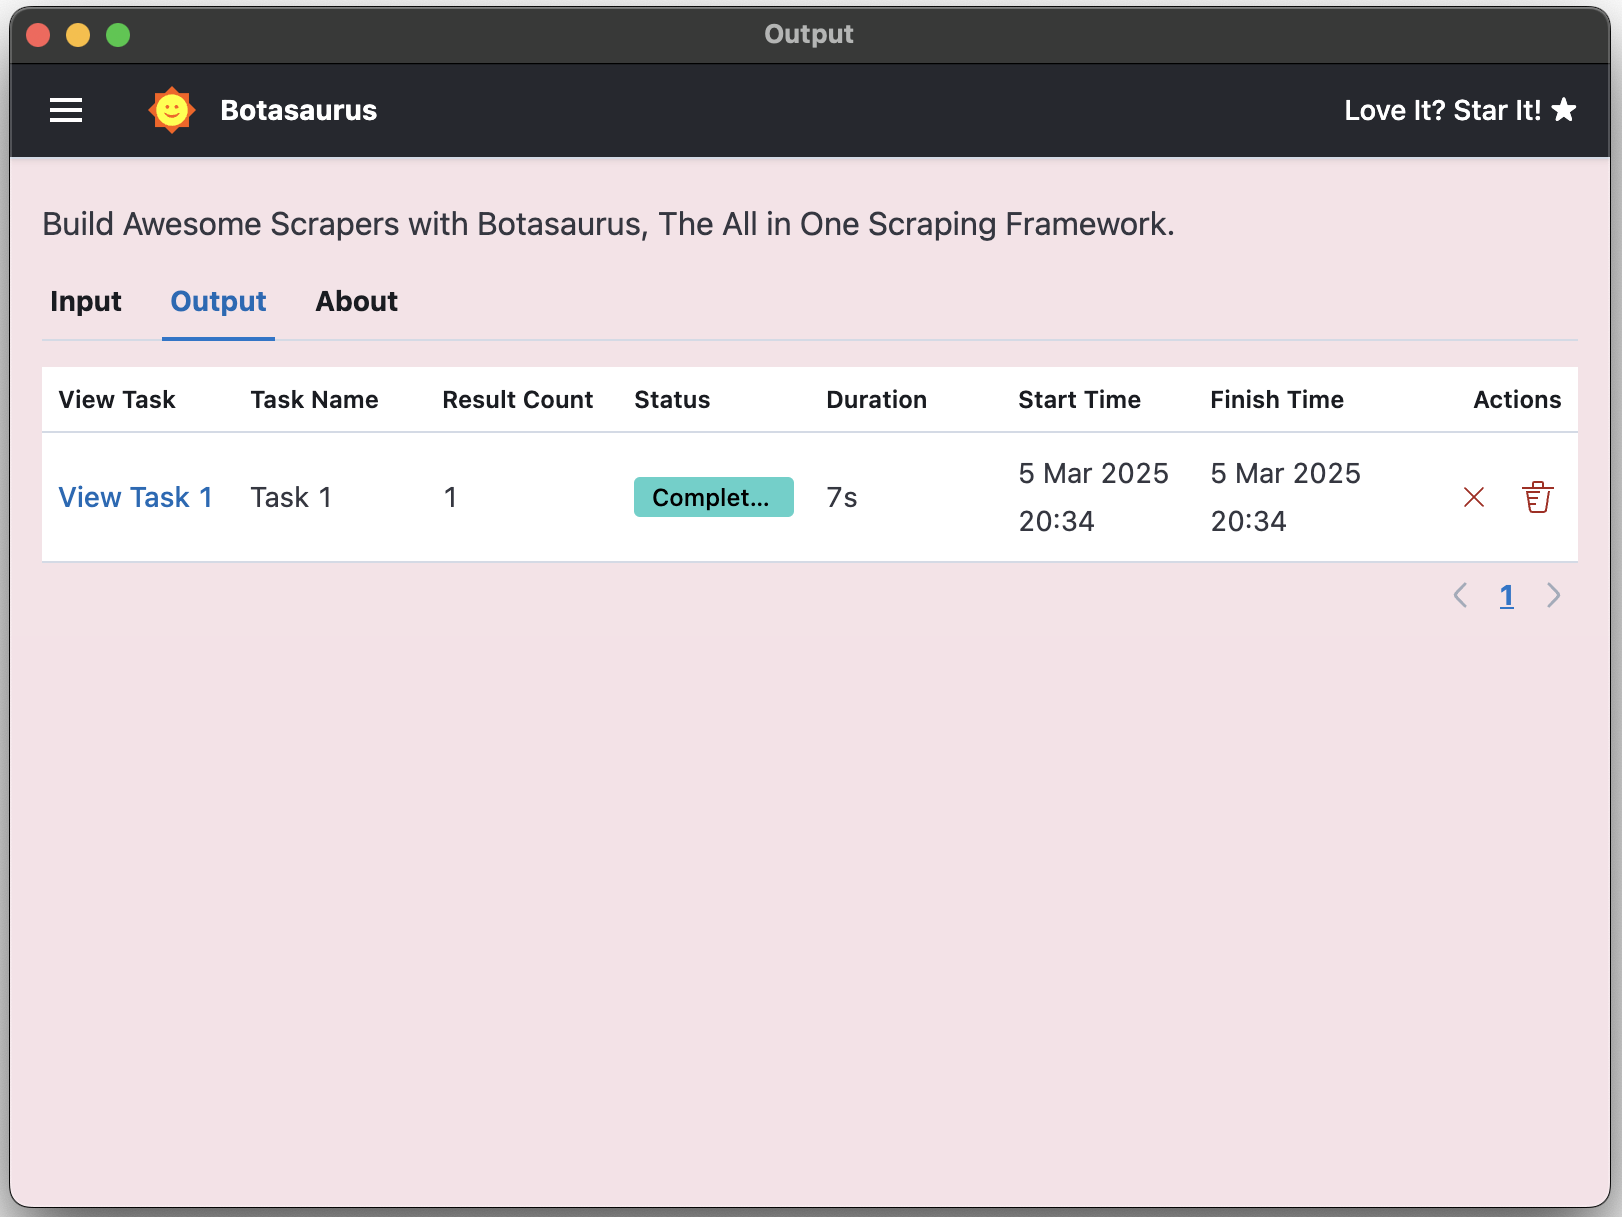
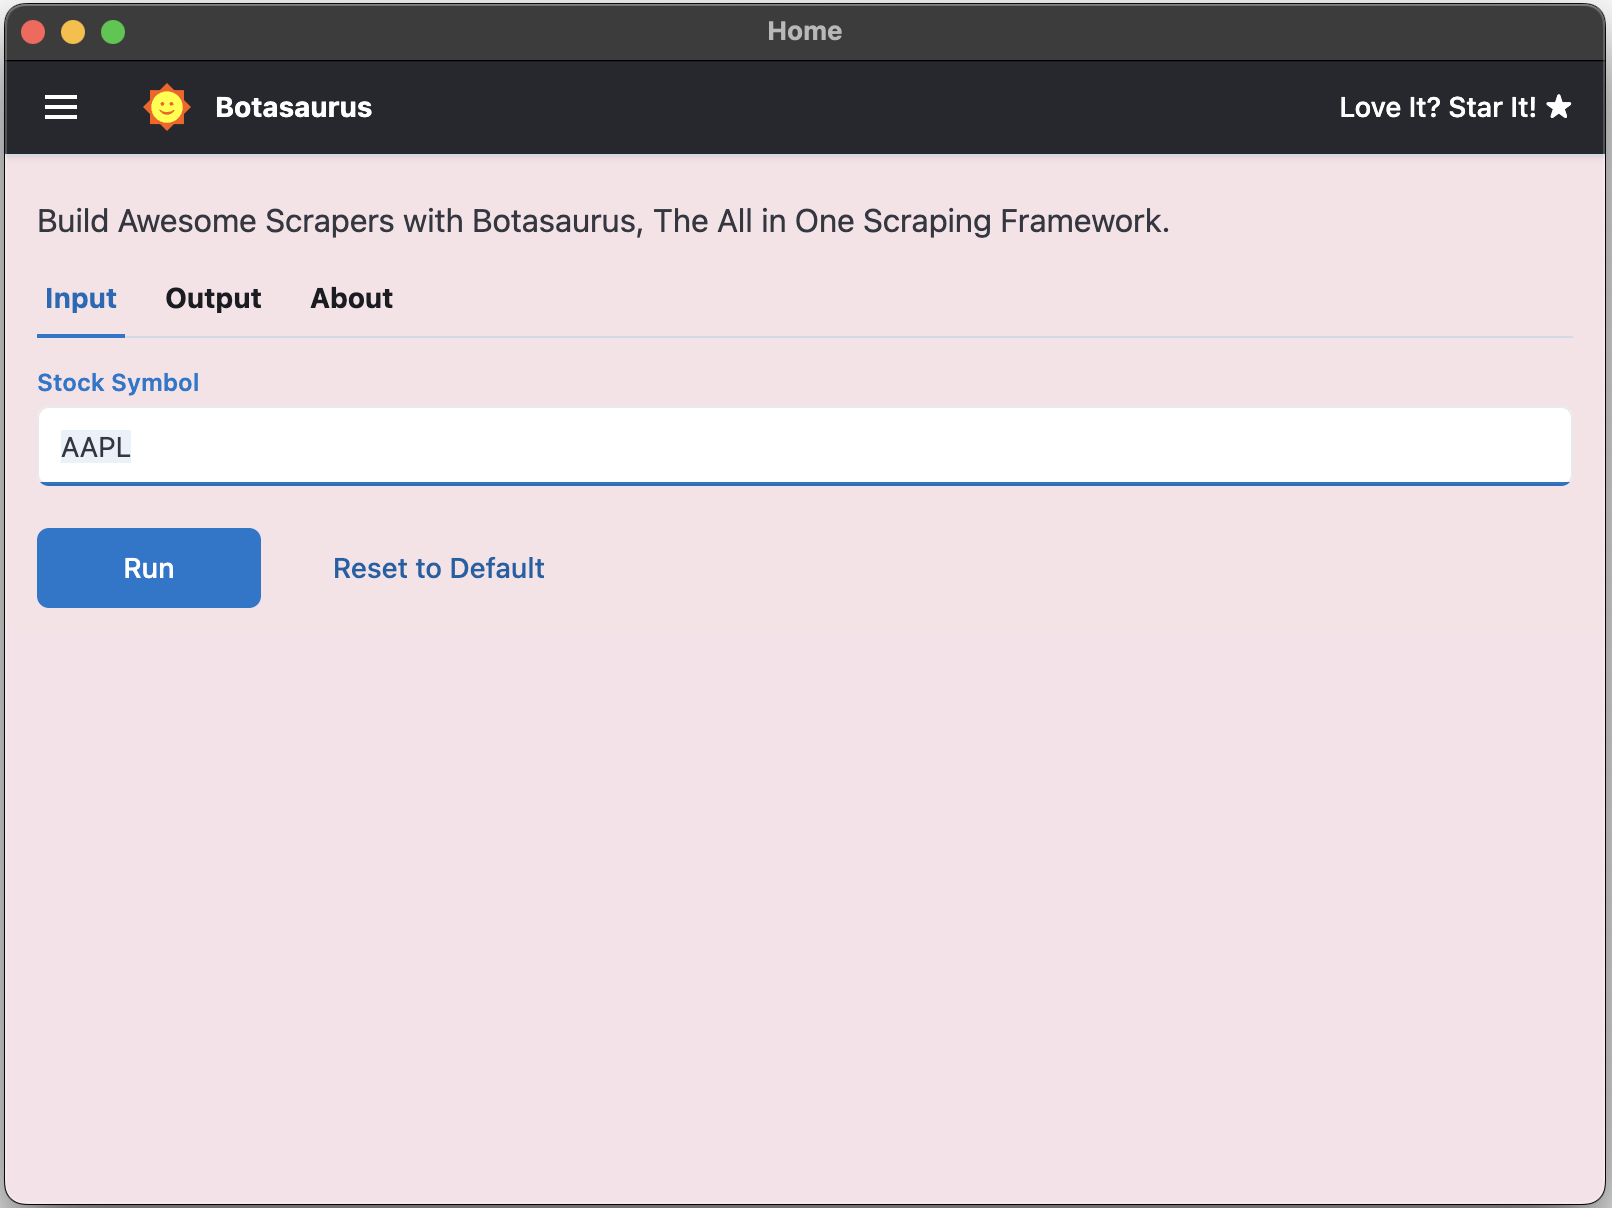
An app will open with a default heading scraper. Enter the link you want to scrape (e.g., https://example.com/) and click the Run button.

After a few seconds, the data will be scraped.
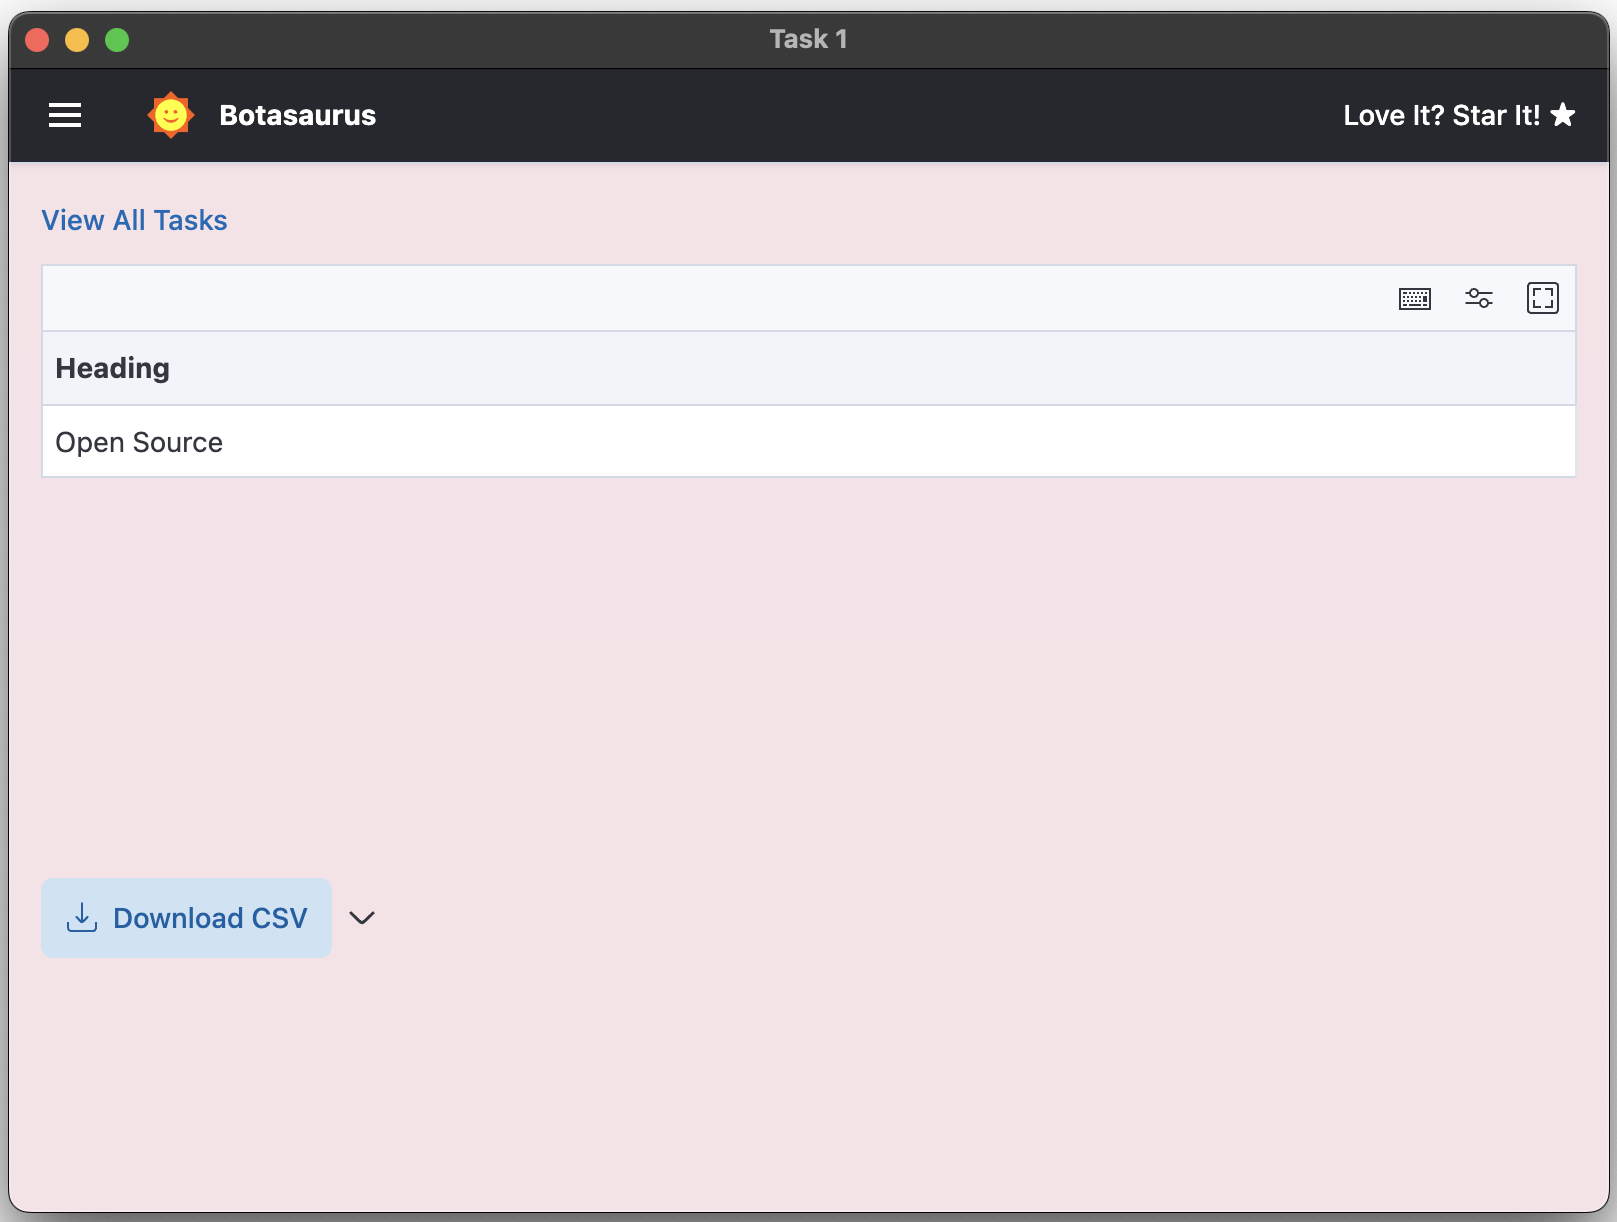
Visit the Output Page to see the tasks you've started.
Go to the About Page to view the rendered README.md file of the project.
Creating a Stock Pricer Scraper with Botasaurus is a simple 3-step process:
- Create your Scraper function to extract stock prices from Yahoo Finance using Playwright
- Add the Scraper to the Server using 1 line of code
- Define the input controls for the Scraper
Let's dive into the code to understand the process in detail.
In src/scraper/src/scraper.ts, paste the following code to create stockPriceScraper which will:
- Receive a
dataobject and extract the "stock_symbol". - Create a link for the Yahoo Finance URL based on the stock symbol.
- Visit the link using Playwright.
- Extract the stock price from the page.
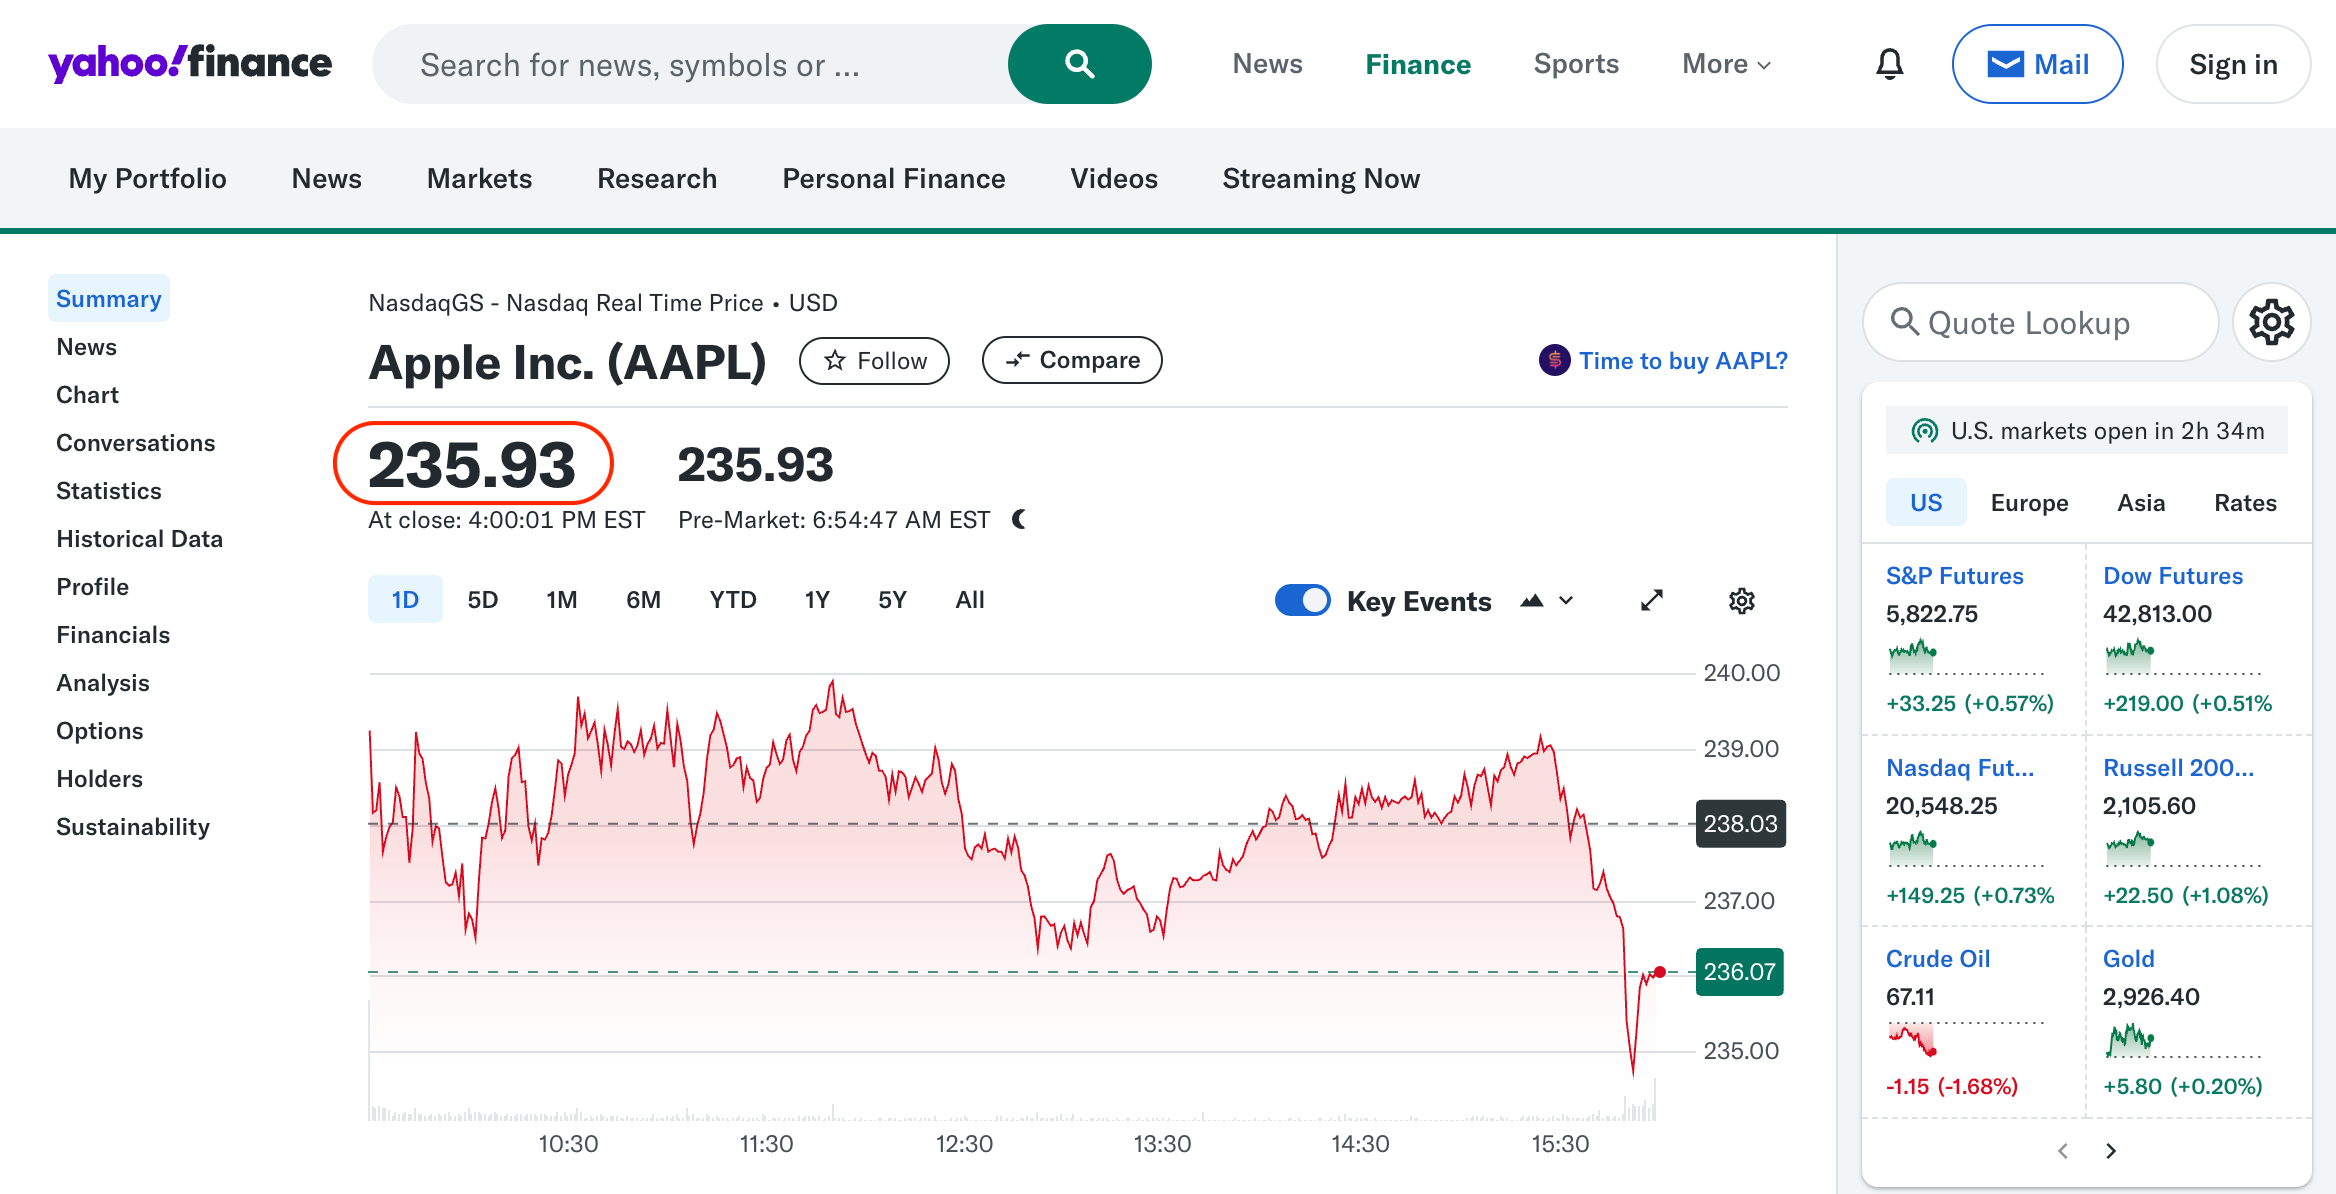
- Return the stock price in a structured format.
Additionally, we name the scraper stockPriceScraper, which is required for Botasaurus to find the input controls, which we will create later.
import { playwright } from 'botasaurus/playwright';

const stockPriceScraper = playwright<any>({

  // Run the scraper opening a browser window
  headless: false,
  // Reuse the browser instance for multiple tasks
  reuseDriver: true,
  // Name the scraper for Botasaurus to find inputs
  name: 'stockPriceScraper',
  run: async ({ data, page }) => {
    // Extract the stock symbol from the input data
    const stock_symbol = data['stock_symbol'];
    // stock_symbol the Yahoo Finance URL using the stock symbol
    const link = `https://finance.yahoo.com/quote/${stock_symbol}`;

    // Navigate to the Yahoo Finance page
    await page.goto(link, { waitUntil: 'domcontentloaded' });

    // Extract the stock price using a selector
    const stock_price = parseFloat(
      (await page.textContent('[data-testid="qsp-price"]')) as string,
    );

    // Return the extracted stock price
    return {
      stock_symbol: stock_symbol,
      stock_price: stock_price,
    };
  },
});

export { stockPriceScraper };In src/scraper/backend/server.ts, paste the following code to:
- Import the
stockPriceScraperfunction. - Use
Server.addScraper()to add the scraper.
import { Server } from 'botasaurus-server/server'
import { stockPriceScraper } from '../src/scraper'

Server.addScraper(
  stockPriceScraper,
);Create a new file named stockPriceScraper.js in the inputs folder and paste the following code. This will:
- Define a
getInputfunction that takes thecontrolsparameter. - Add a text input control for the stock symbol.
- Use JSDoc comments to enable IntelliSense Code Completion in VSCode as you won't be able to remember all the controls in botasaurus.
/**
* @typedef {import('botasaurus-controls').Controls} Controls
*
*/
/**
* @param {Controls} controls
*/
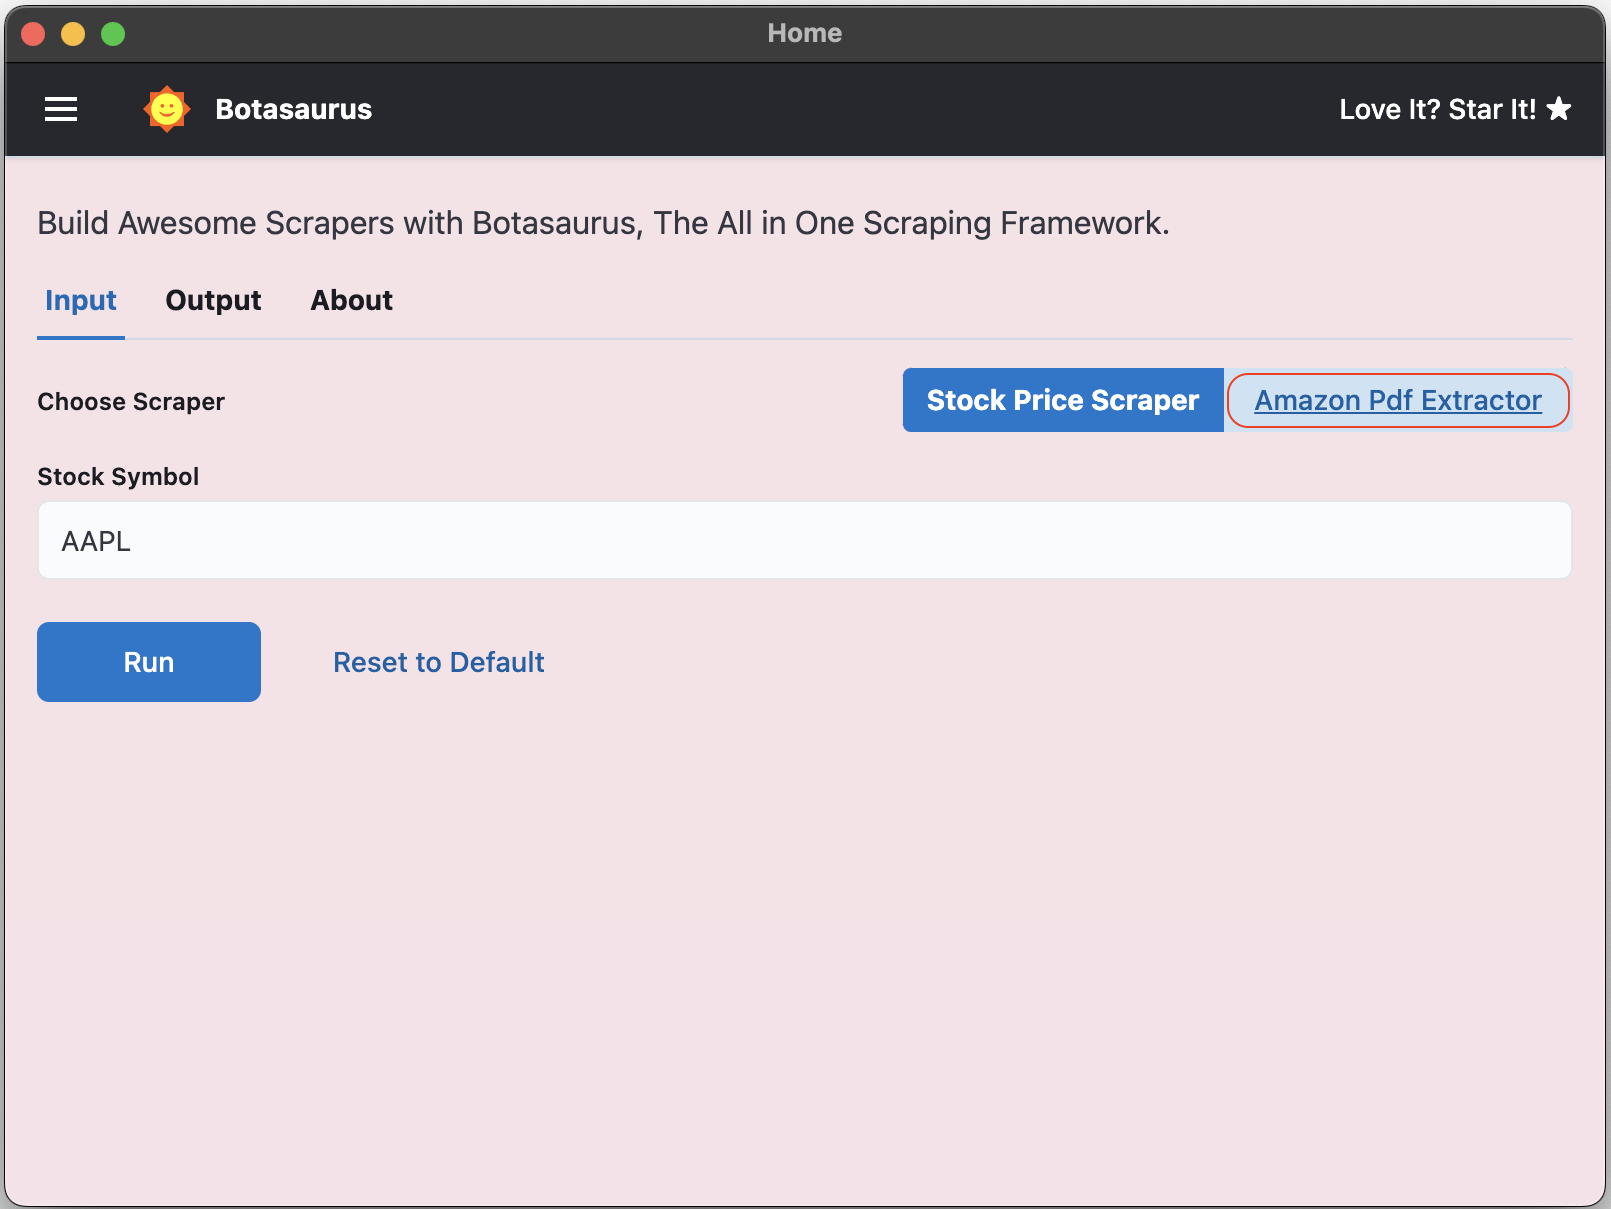
function getInput(controls) {
controls
// Render a Text Input
.text('stock_symbol', {
isRequired: true,
label: 'Stock Symbol',
placeholder: 'Enter a stock symbol (e.g., AAPL)',
defaultValue: 'AAPL'
});
}
You now have a fully functional Stock Pricer Scraper that extracts stock prices from Yahoo Finance.
To test it, simply run npm run dev and launch the scraper.
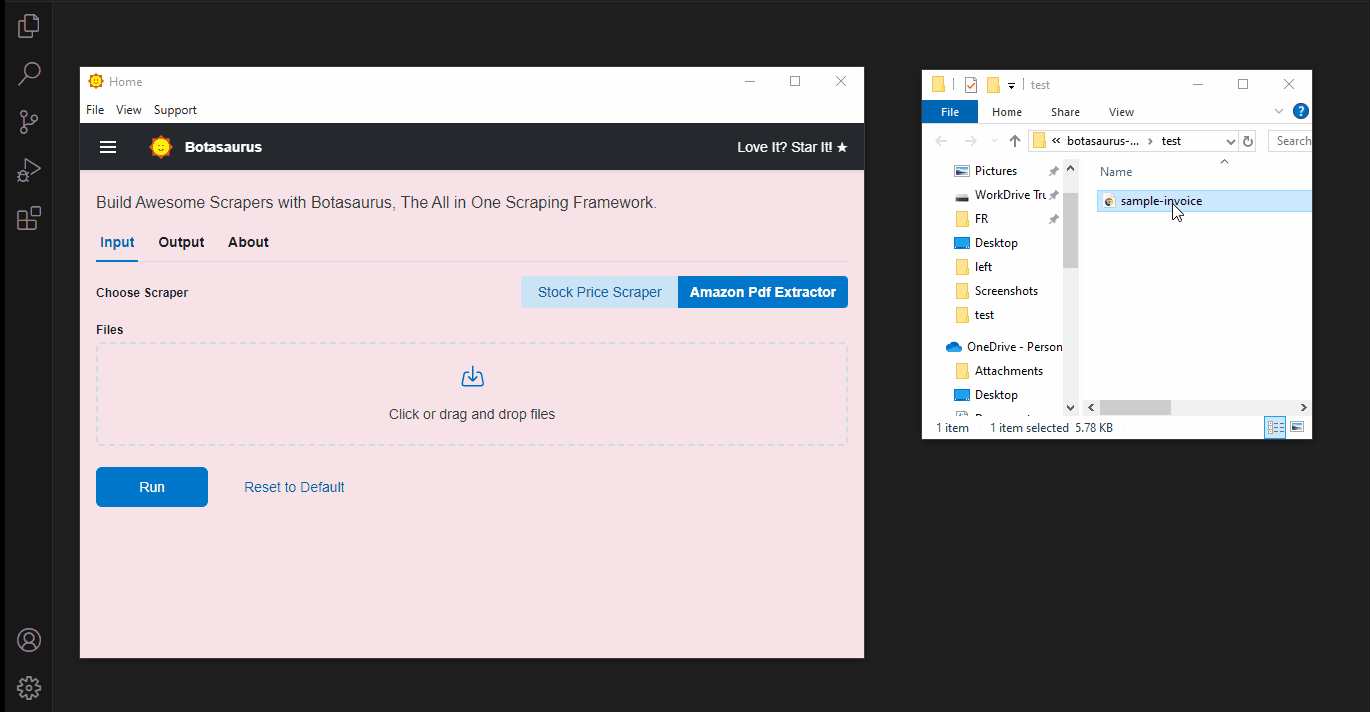
Let's create an Amazon Invoice PDF Extractor to automatically pull key details like Place of Supply, GSTIN, Document Number, and Document Date from Amazon invoice PDFs. This tool will save a lot of manual effort.
Install the electron-pdf-parse library for PDF parsing, which is a fork of the pdf-parse library designed to work seamlessly with Electron.
npm install electron-pdf-parseIn src/scraper/src, create a file amazonPdfExtractor.ts and paste the following code to define the amazonPdfExtractor function. This will:
- Read the PDF file.
- Extract text from the PDF.
- Use regex to parse key details like the place of supply, GSTIN, document number, and document date.
// Import necessary libraries
import fs from "fs"; // For file system operations
import pdf from "electron-pdf-parse"; // For parsing PDF files
import { task } from "botasaurus/task"; // For task management

// Main function to extract data from the PDF text
async function extractFromText(text, pdfPath) {

  // Utility function to format date from 'MM/DD/YYYY' to 'DD-MM-YYYY'
  function formatDate(dateStr) {
    const [month, day, year] = dateStr.split("/");
    return `${day}-${month}-${year}`;
  }

  // Extract place of supply using regex
  const placeOfSupplyMatch = text.match(/Place of supply : ([\w\s]+)\(/);
  // Extract GSTIN using regex (reverse text to find it easily)
  const gstinMatch = text.split("\n").reverse().join("\n").match(
    /GSTIN : (\d{2}[A-Z]{5}\d{4}[A-Z]{1}\d{1}[Z]{1}[A-Z\d]{1})/
  );
  // Extract document number using regex
  const documentNumberMatch = text.match(/Document Number\s*([A-Z0-9]+)/);
  // Extract document date using regex
  const documentDateMatch = text.match(/Document Date\s*(\d{2}\/\d{2}\/\d{4})/);

  // Prepare the results object
  const results = {
    "Place of Supply": placeOfSupplyMatch ? placeOfSupplyMatch[1].trim() : null,
    GSTIN: gstinMatch ? gstinMatch[1] : null,
    "Document Number": documentNumberMatch ? documentNumberMatch[1] : null,
    "Document Date": documentDateMatch
      ? formatDate(documentDateMatch[1])
      : null,
  };

  return results;
}

// Function to read and extract data from a PDF file
async function extractData(pdfPath) {
  const dataBuffer = fs.readFileSync(pdfPath); // Read the PDF file
  const data = await pdf(dataBuffer); // Parse the PDF
  return extractFromText(data.text, pdfPath); // Extract data from the parsed text
}

// Task definition for the Amazon PDF Extractor
export const amazonPdfExtractor = task<any>({
  name: "amazonPdfExtractor", // Name of the task
  run: async function ({ data }) {
    const files = data["files"]; // Get the list of files to process
    const results: any[] = []; // Array to store results

    // Process each file
    for (const file of files) {
      try {
        const result = await extractData(file.path); // Extract data from the PDF
        results.push(result); // Add the result to the array
      } catch (error: any) {
        console.error(error); // Log any errors
        results.push({ failed: file, error: error.toString() }); // Add error details to results
      }
    }
    return results; // Return the results
  },
});In src/scraper/backend/server.ts, add the following code to:
- Import the
amazonPdfExtractorfunction. - Use
Server.addScraper()to add the scraper.
import { amazonPdfExtractor } from '../src/amazonPdfExtractor';

Server.addScraper(
  amazonPdfExtractor,
);Create a new file named amazonPdfExtractor.js in the inputs folder and paste the following code. This will:
- Define a
getInputfunction that takes thecontrolsparameter. - Add a file picker for selecting the Amazon invoice PDFs.
/**
 * @typedef {import('botasaurus-controls').Controls} Controls
 * @typedef {import('botasaurus-controls').FileTypes} FileTypes
 *
 */

const { FileTypes } = require('botasaurus-controls')

/**
 * @param {Controls} controls
 */
function getInput(controls) {
    // Render a File Input for uploading PDFs
    controls.filePicker('files', {
      label: "Files",
      accept: FileTypes.PDF,
      isRequired: true,
    })
}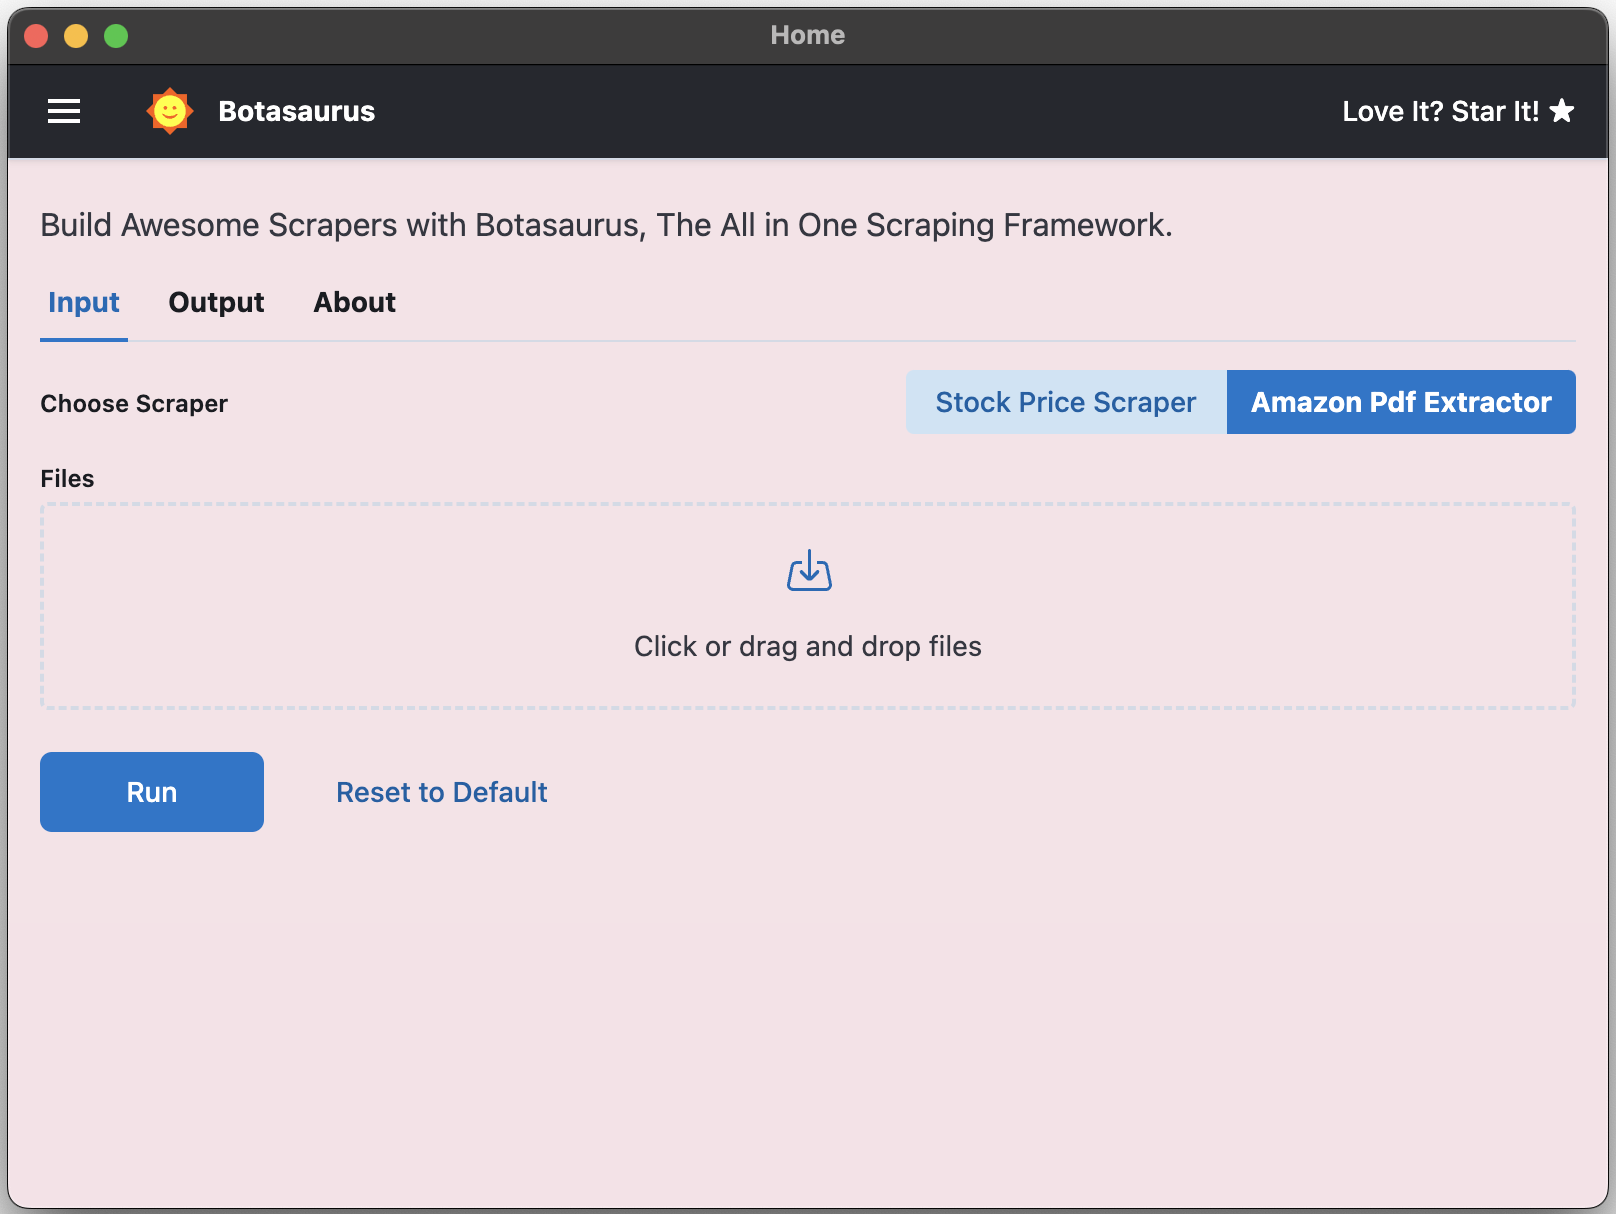
That's it! You now have a fully functional Amazon Invoice PDF Extractor ready to use.
To test the extractor:
- Download a sample Amazon invoice PDF from here.
- Click the Amazon PDF Extractor button.
- Upload the PDF and run the extractor to see the extracted data.
You can find the complete code for this tutorial, including the Stock Pricer Scraper and Amazon Invoice PDF Extractor, in the Botasaurus Desktop Tutorial GitHub Repository.
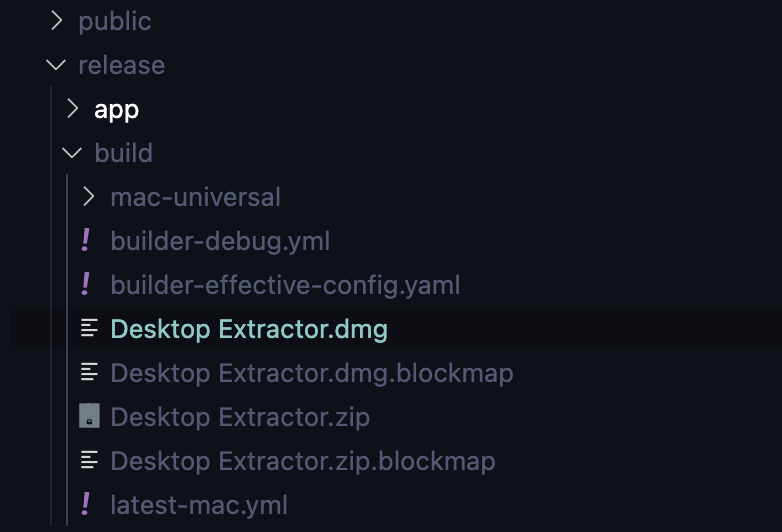
To create an installer for your operating system, run the following command:
npm run packageAfter executing the command, you can find the installer for your OS in the release/build folder.
Note
On Windows, if you face the "resource busy or locked" error:
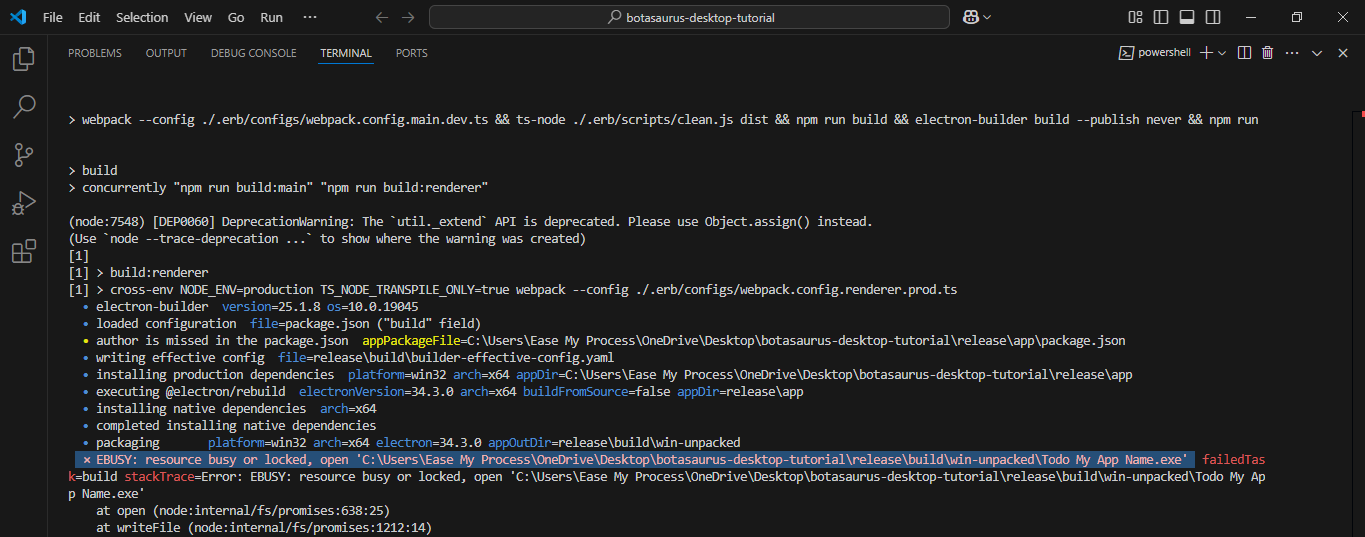
Please follow these steps to resolve the issue:
- Run the Command Prompt as an Administrator.
- 'cd' to your project directory.
- Run the command
npm run packageagain to create the installer.
This will resolve the error and allow the installer to be created successfully.
We need to create 4 installers for your app:
.dmgfor macOS.exefor Windows.debfor Ubuntu/Debian.rpmfor Fedora/CentOS/Red Hat
To create each installer, we need to run the 'package' script on each OS. You can imagine how inconvenient it would be to get machines with all these operating systems.
So we will automate this using GitHub Actions. This workflow will:
- Be triggered every time you push code to GitHub.
- Build the installers for all these platforms automatically.
- Upload them to an AWS S3 bucket.
Please follow these steps:
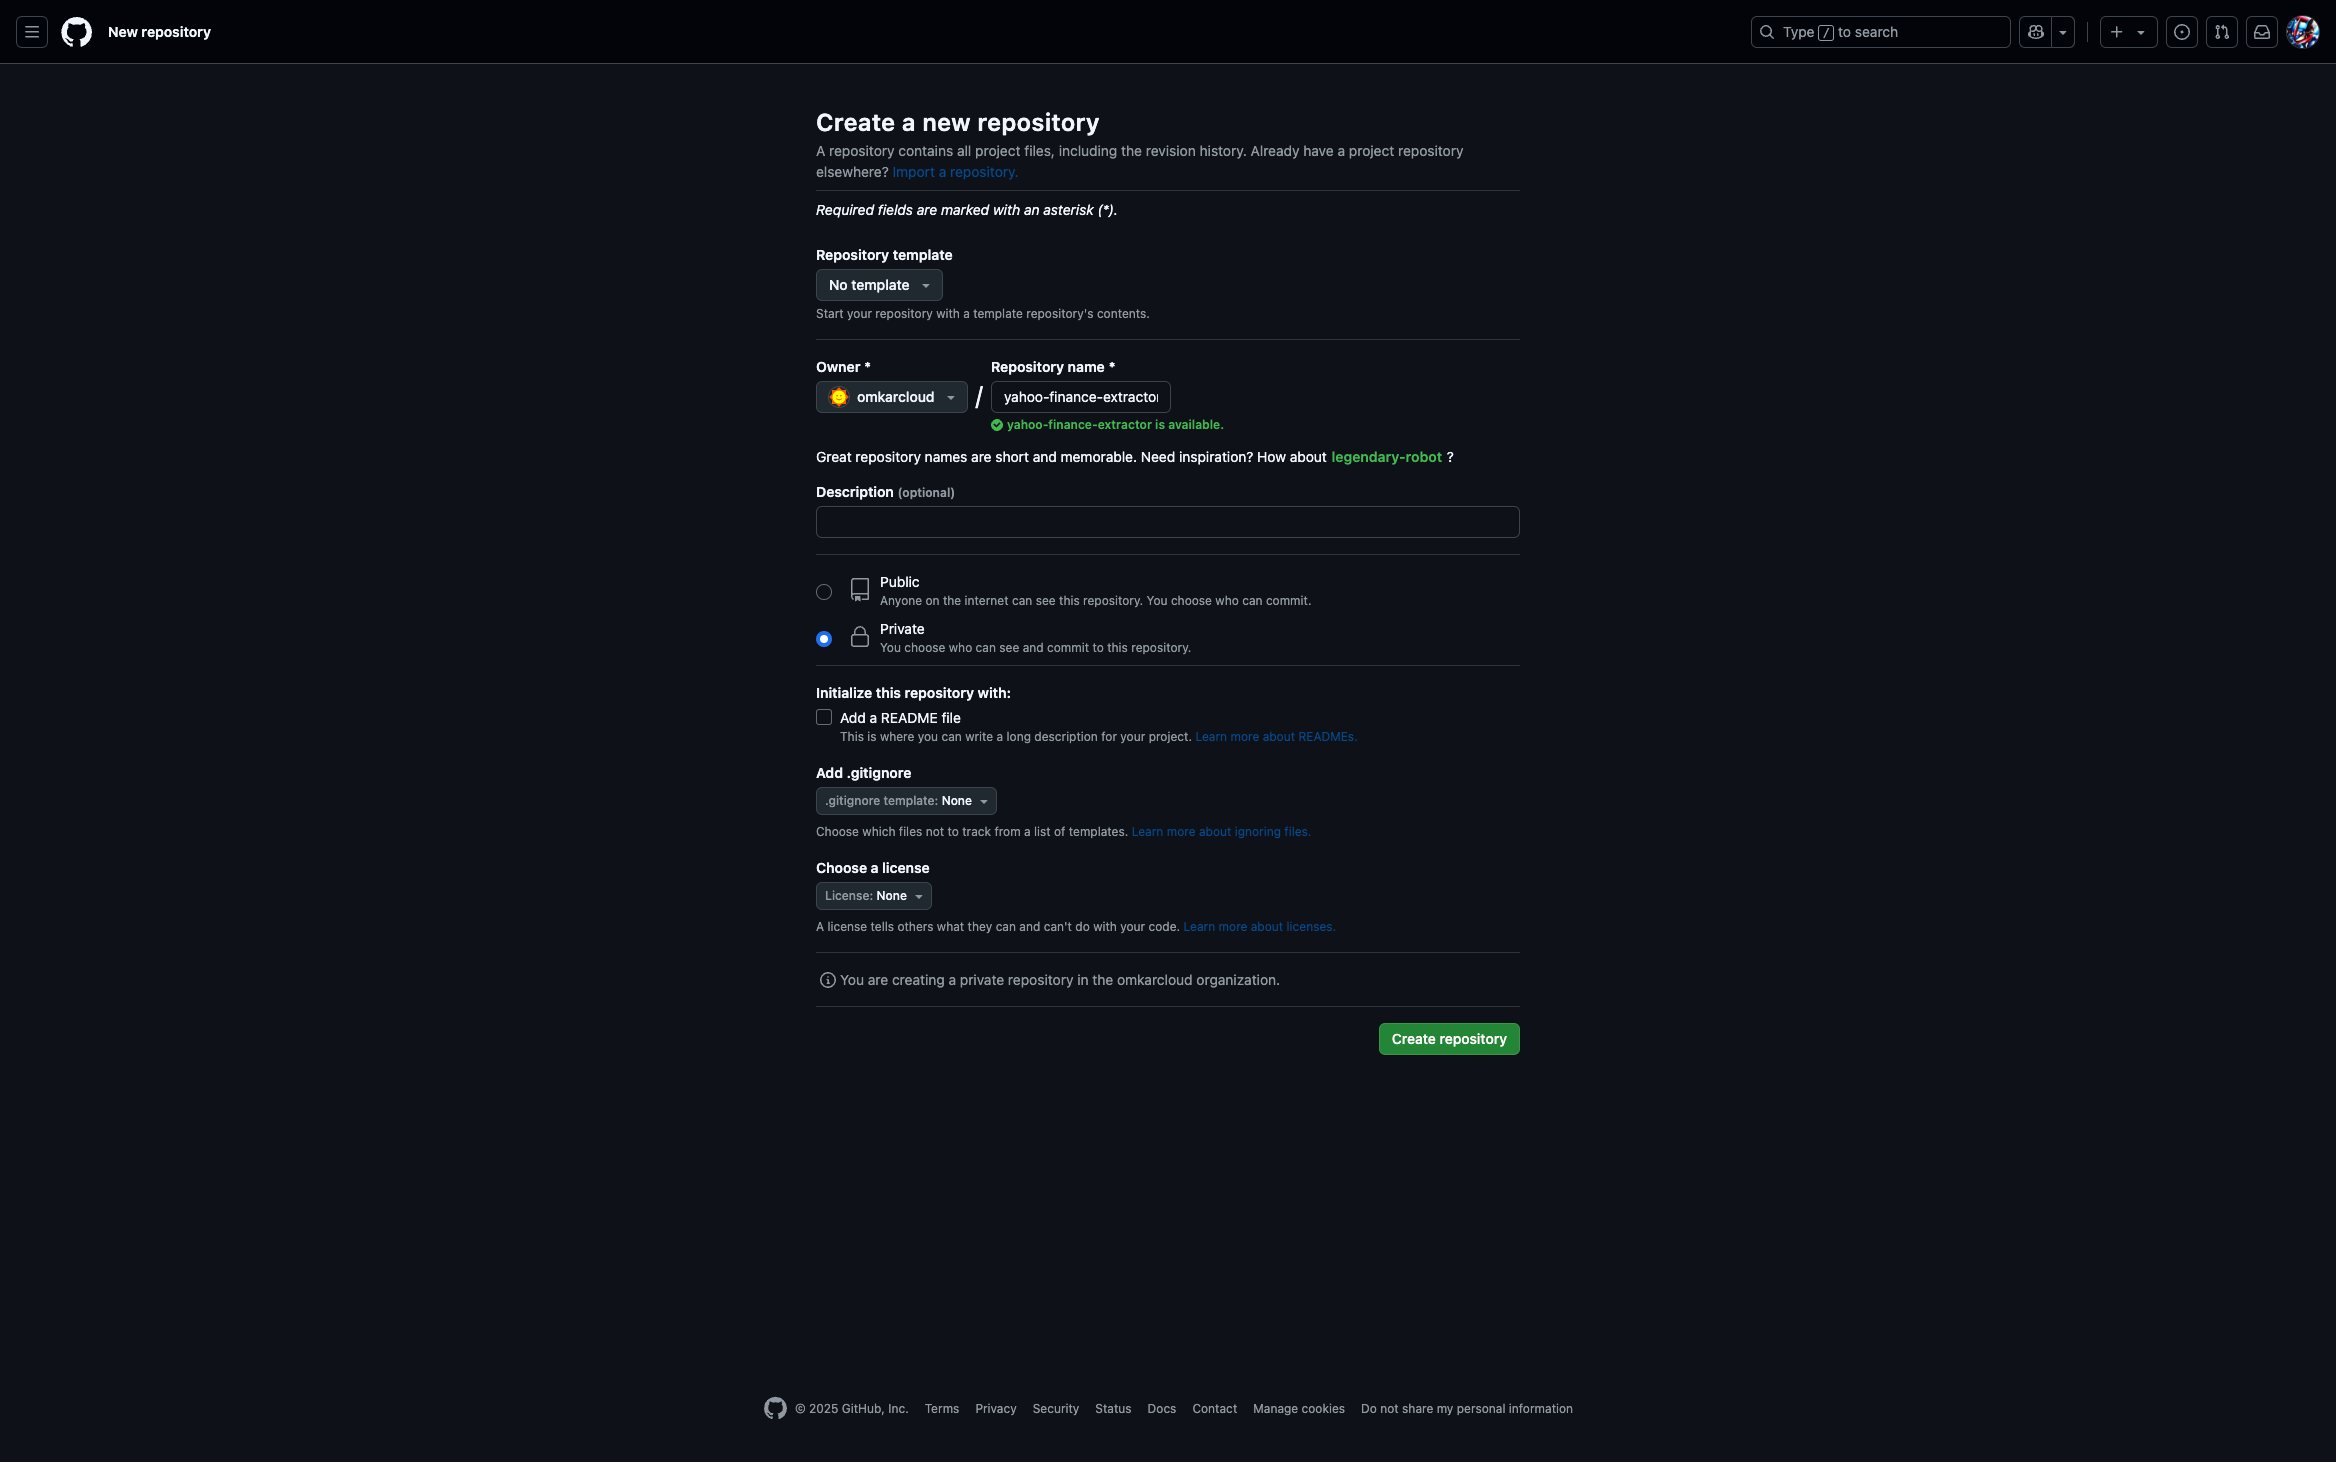
1. GitHub Repository Setup
- Create a new repository on GitHub to host your application.
2. Create an S3 Bucket
- Open the AWS Console > S3.
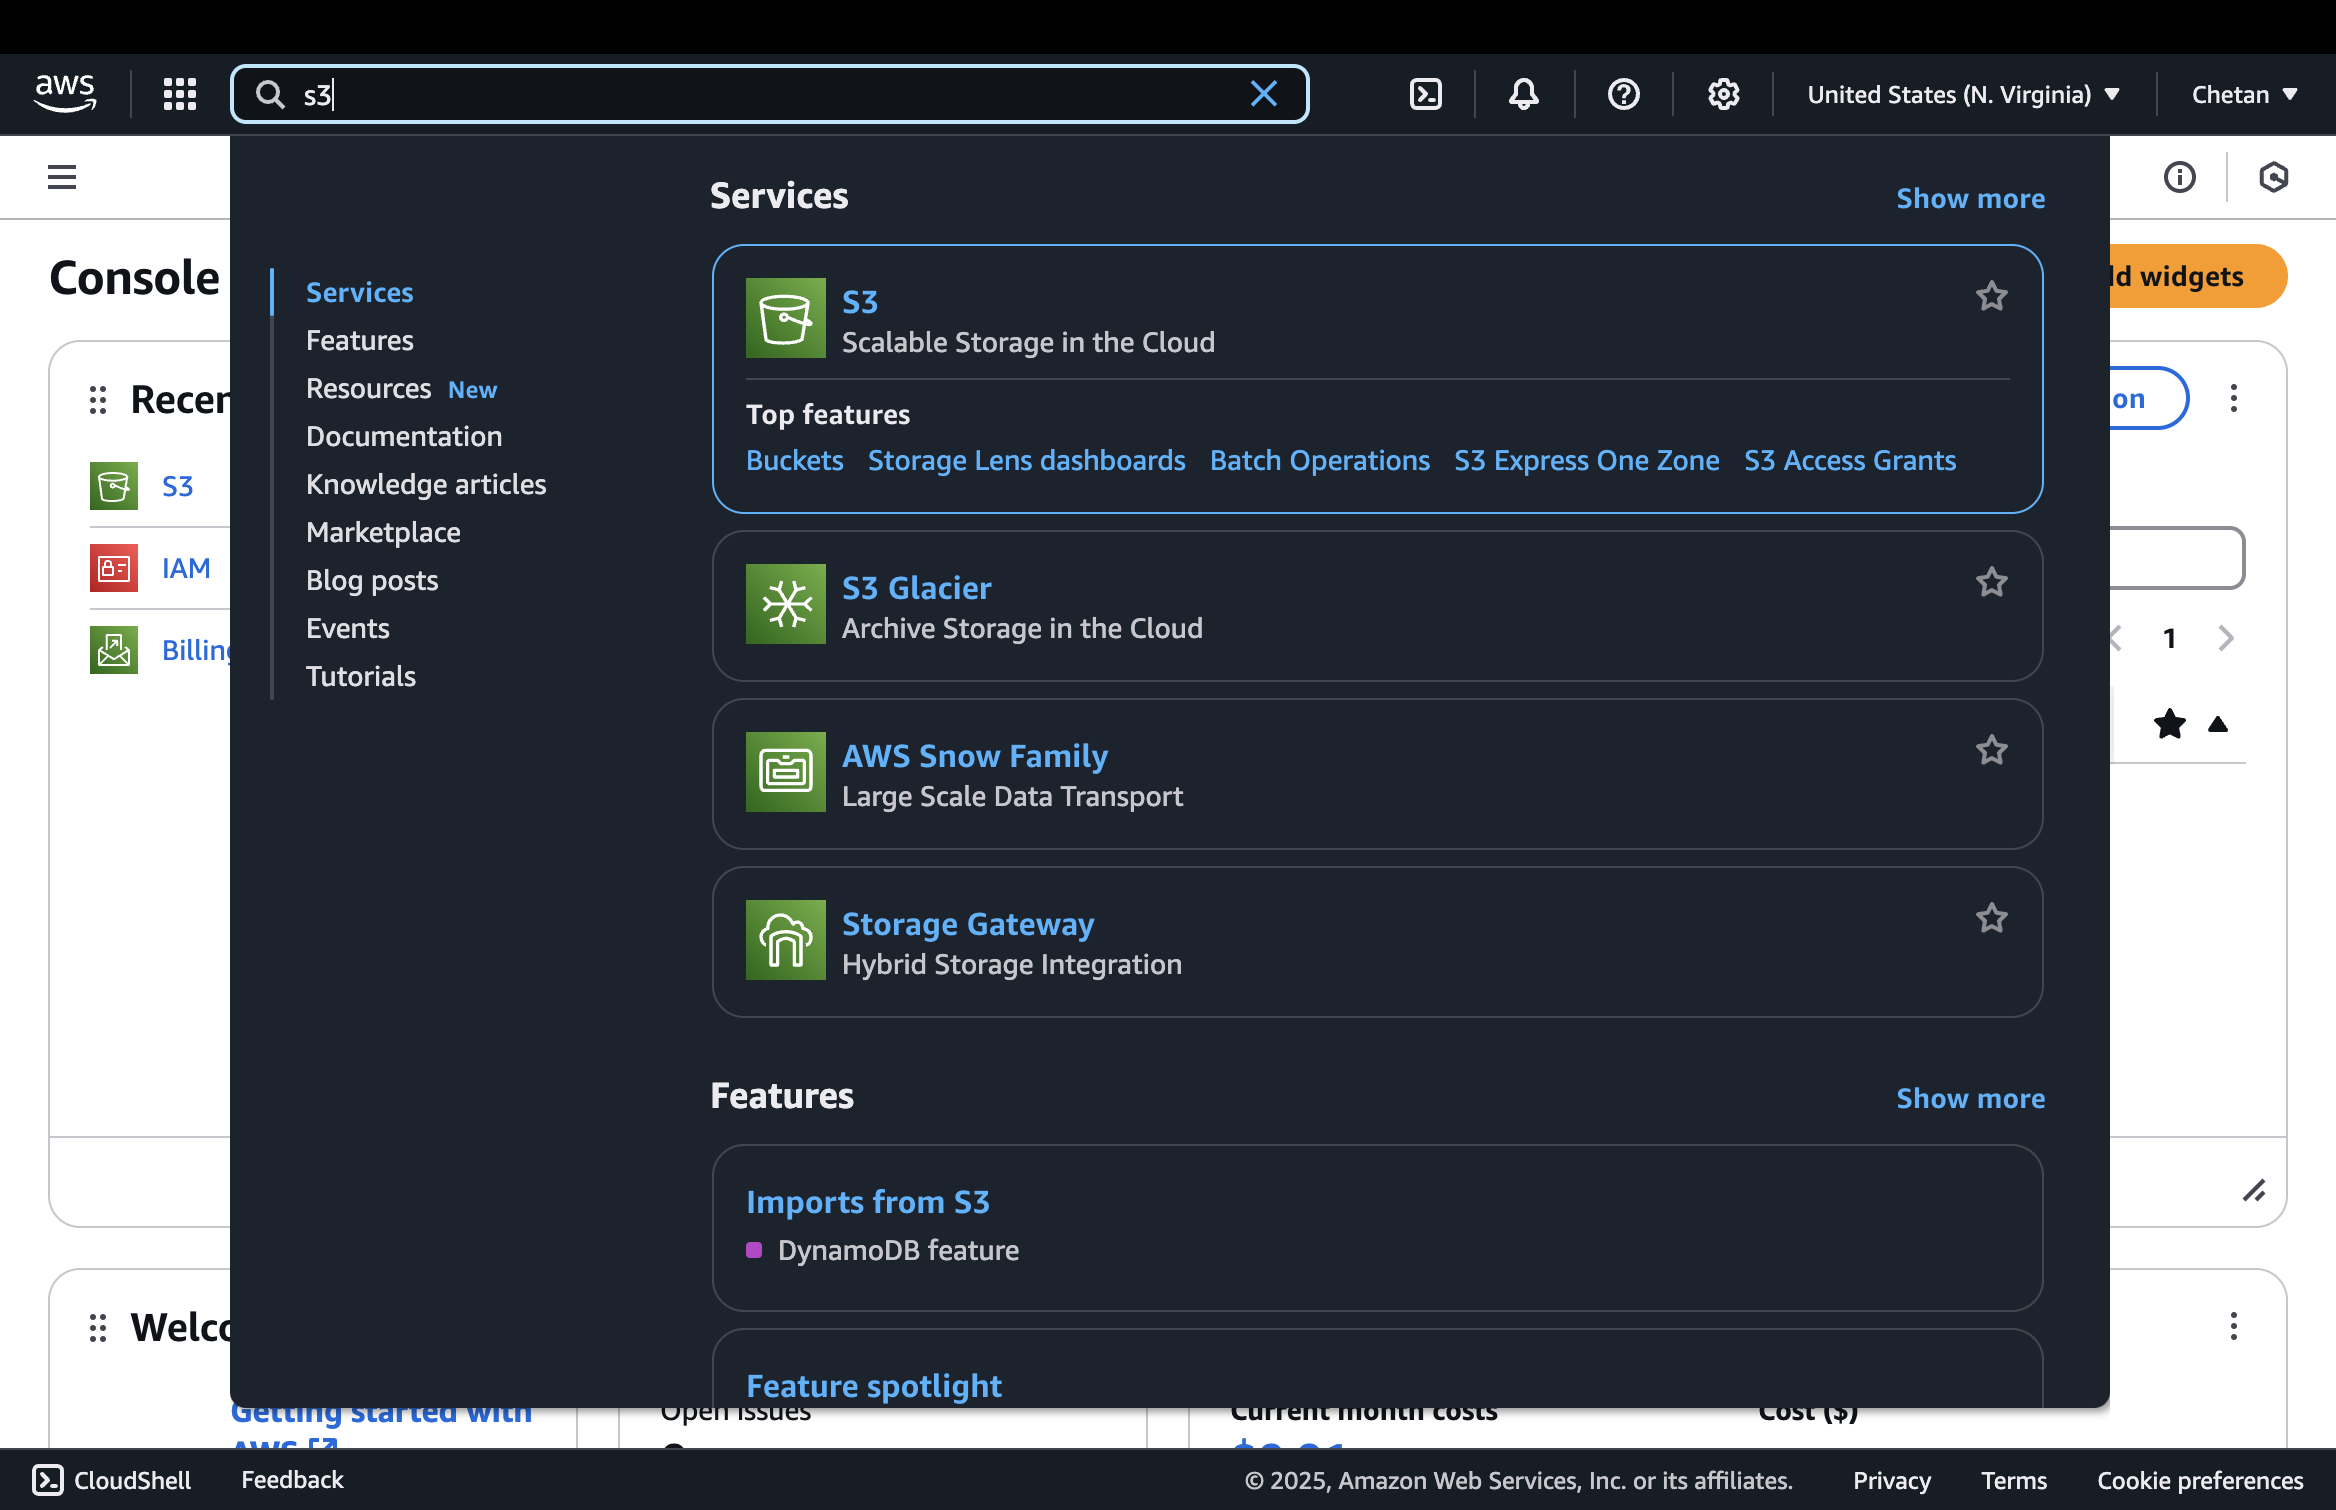
- Click "Create bucket".
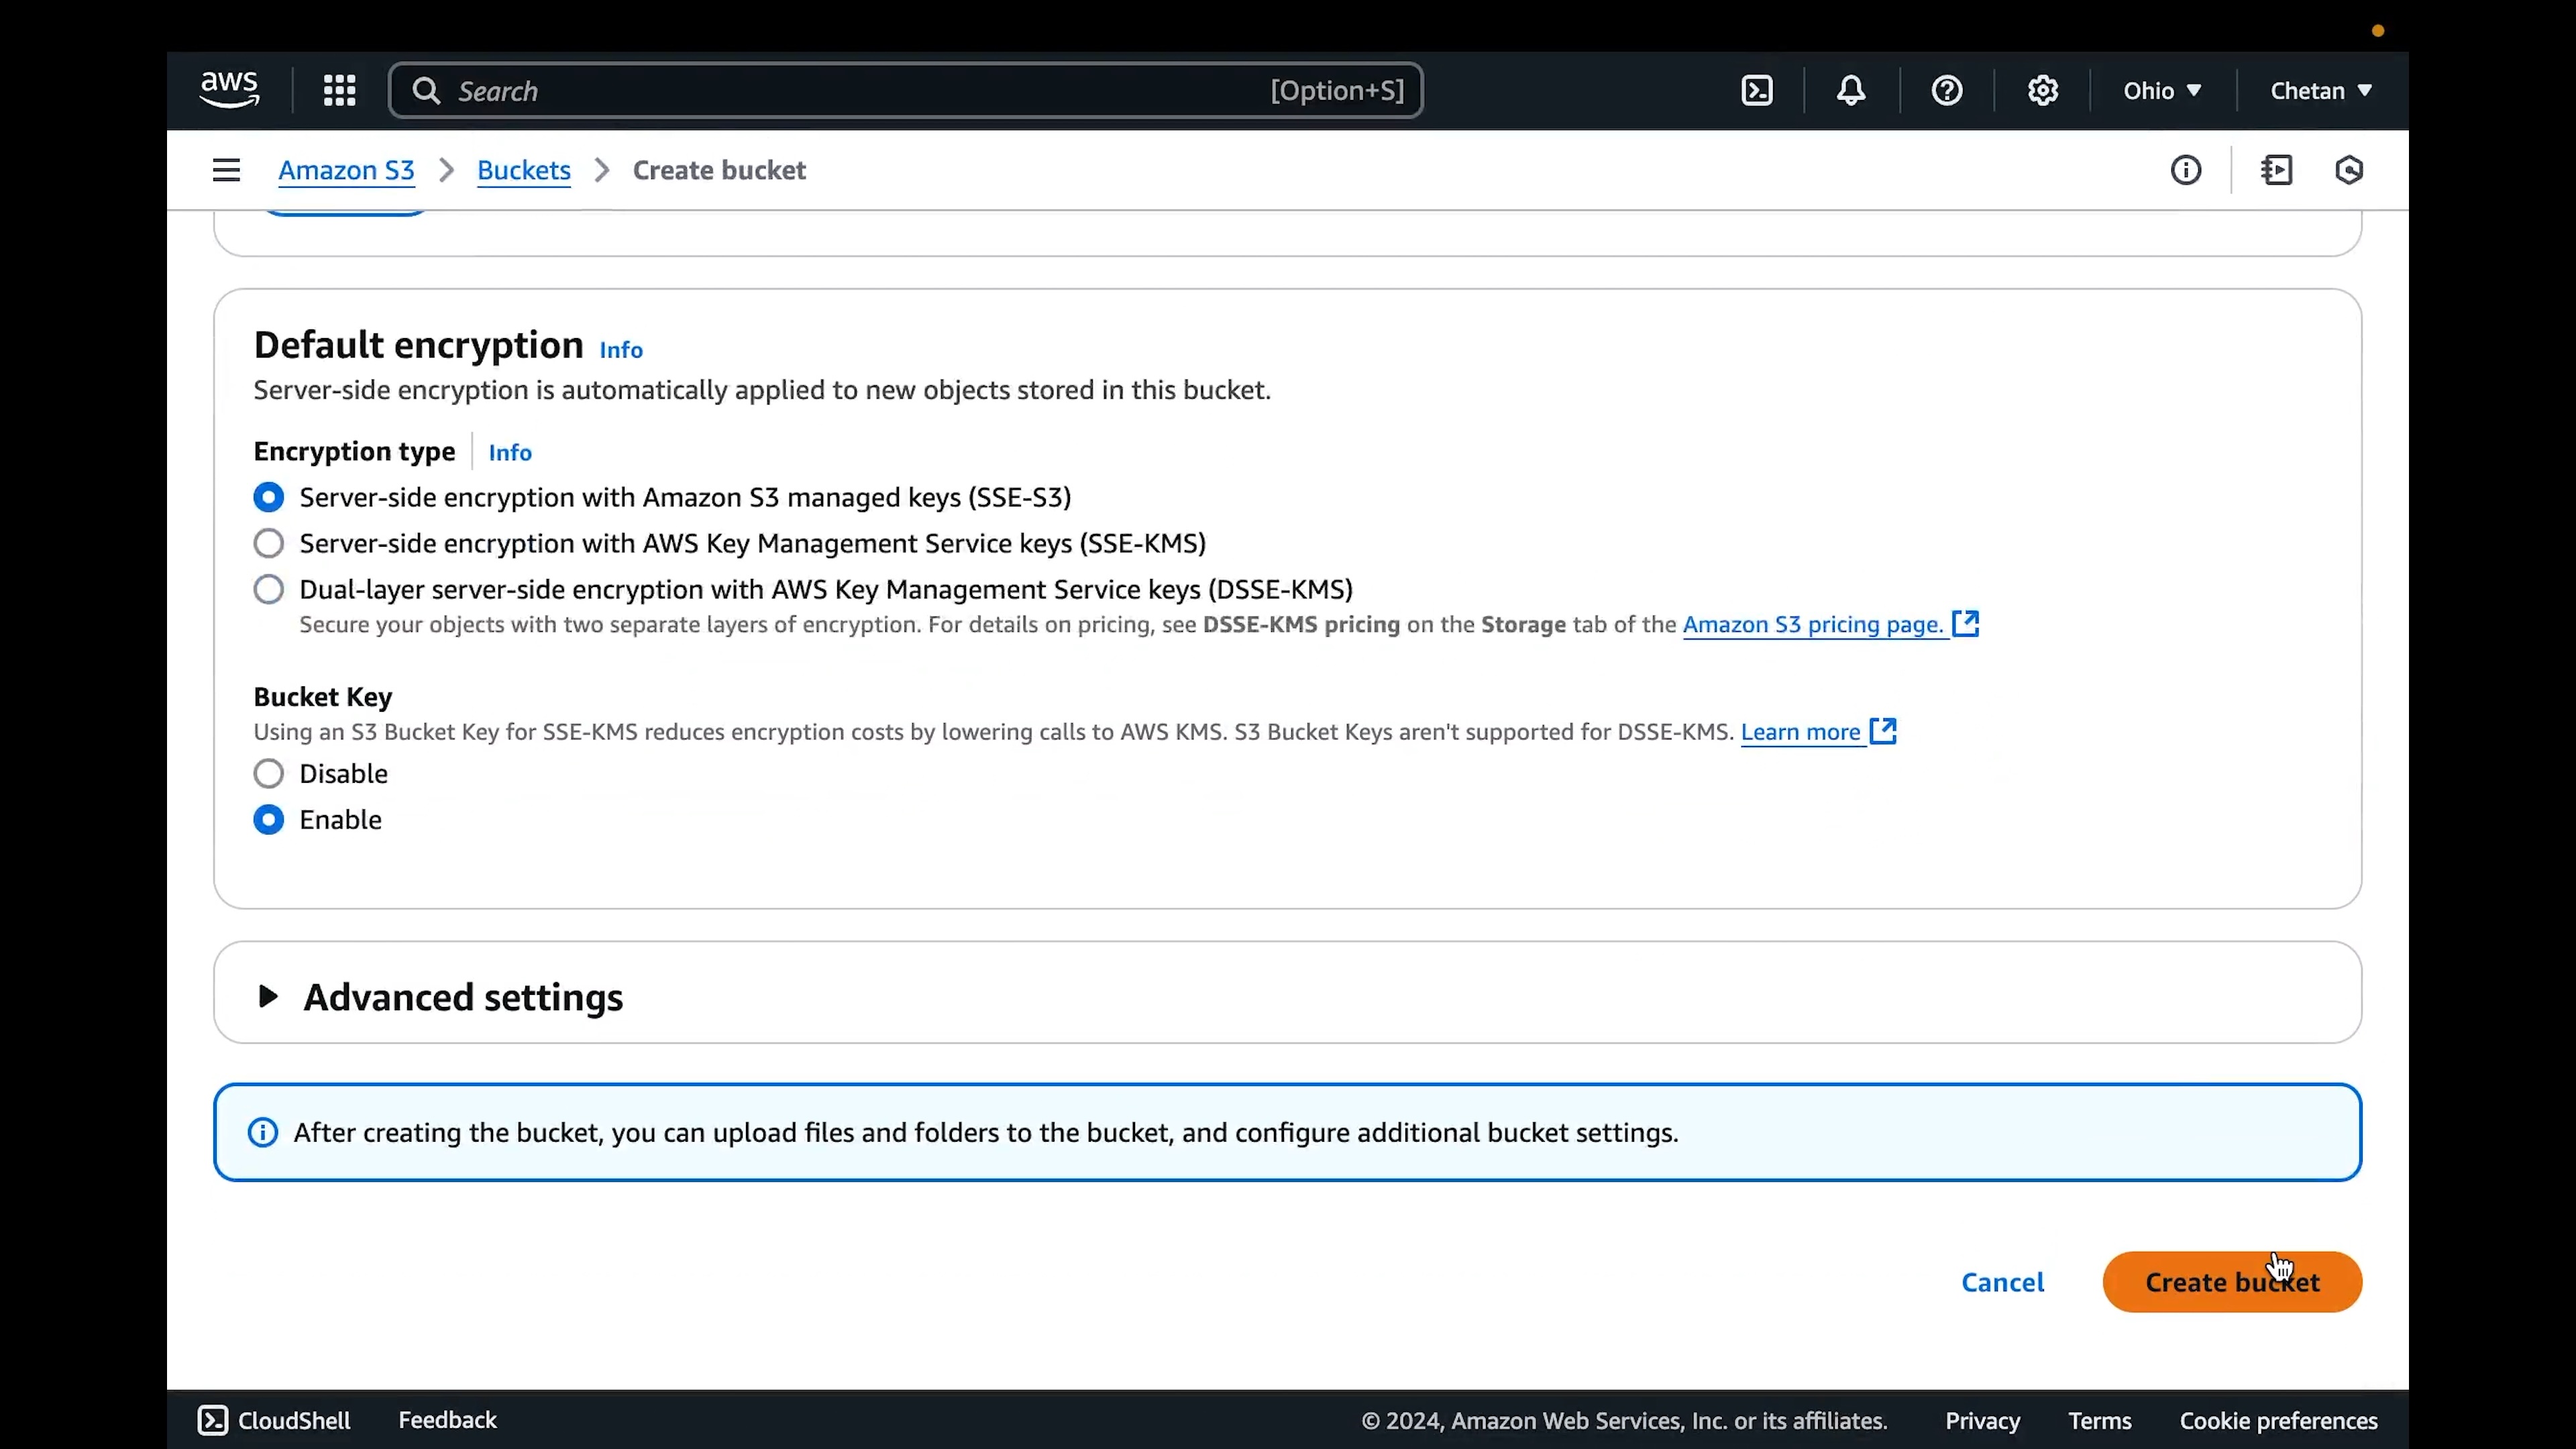
- Configure the bucket:
Bucket name: Enter a unique bucket name. Conventionally, this name matches your product's name in kebab case. For example, if your product's name is "Yahoo Finance Extractor," your bucket name will be `yahoo-finance-extractor`.
Object Ownership: Select ACLs enabled
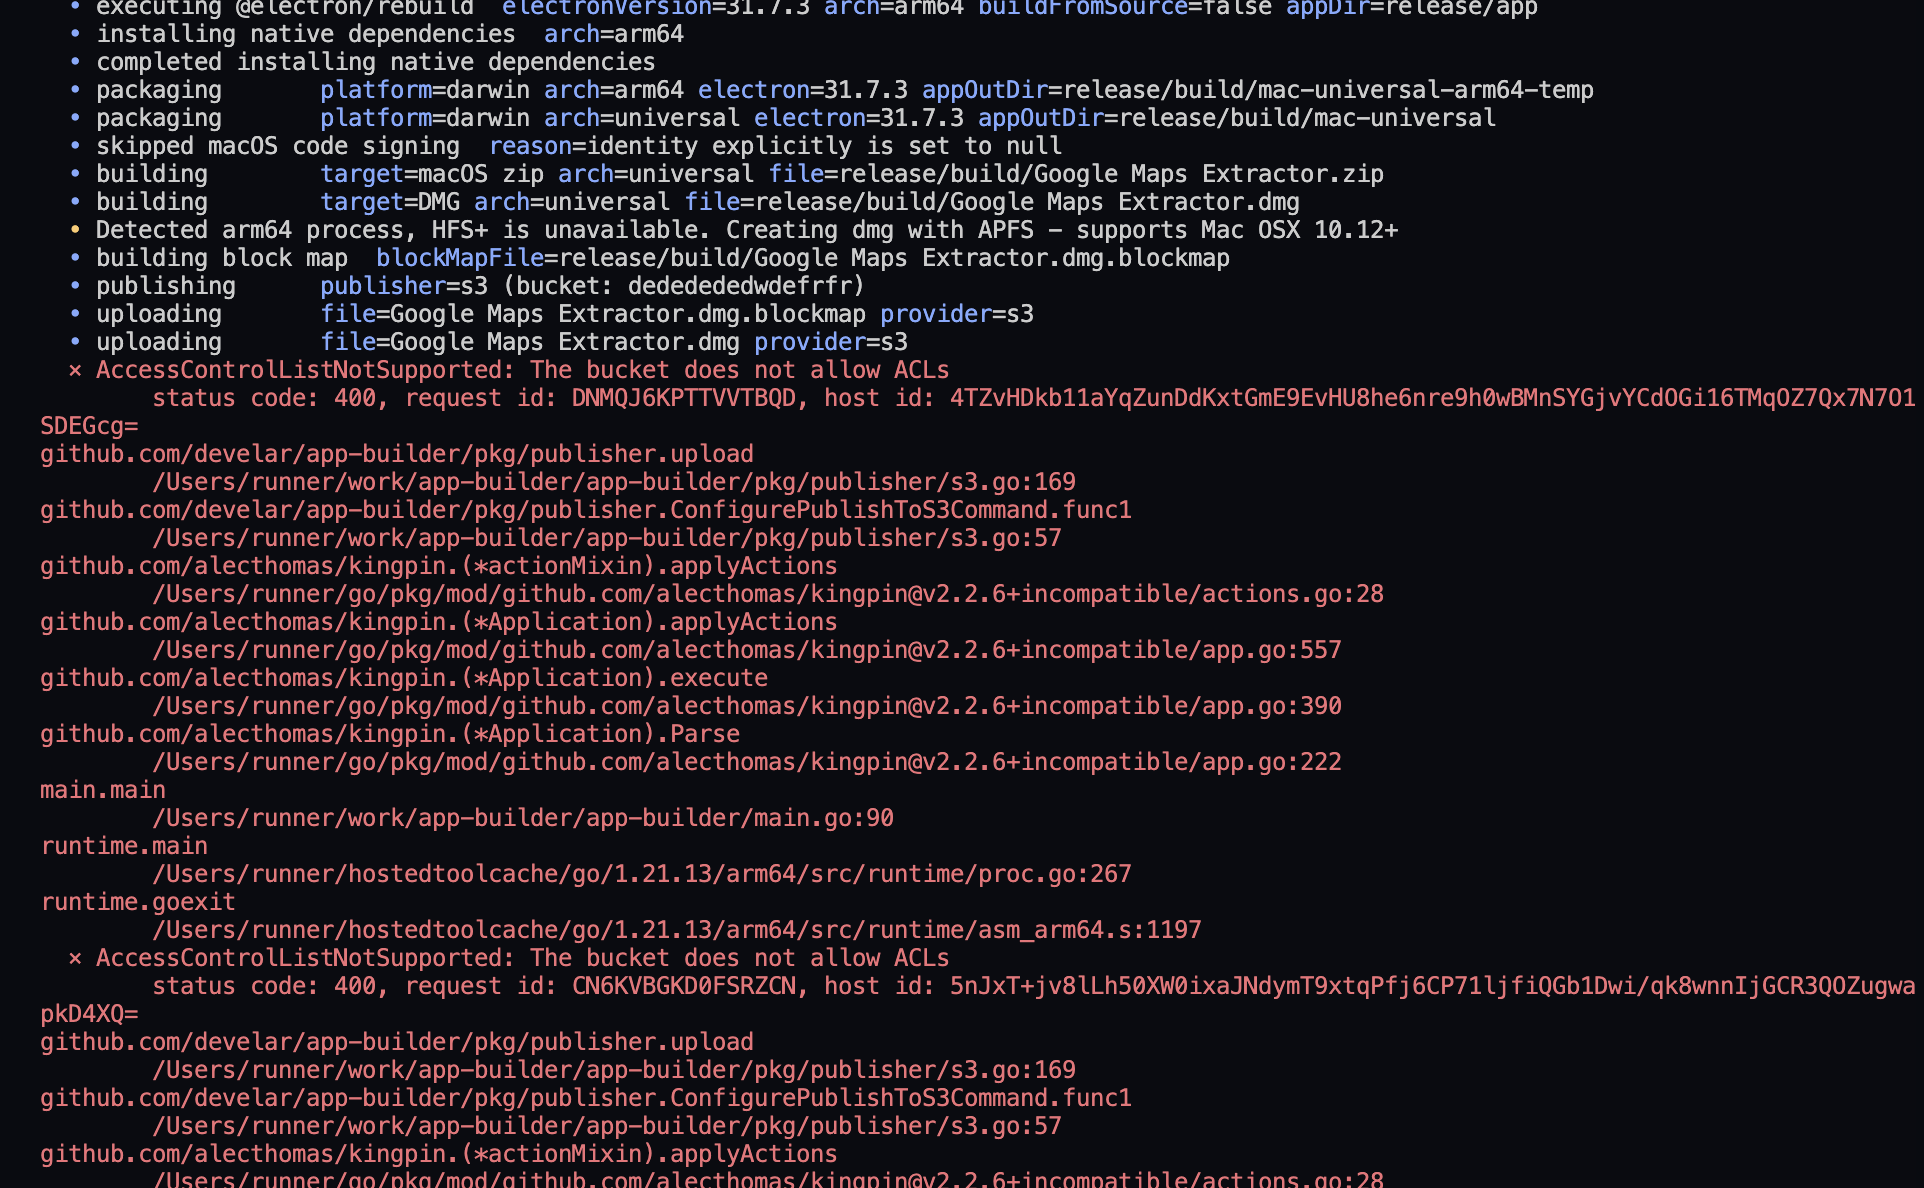
Block Public Access settings for this bucket: Uncheck "Block all public access"
Important Note: Ensure that Object Ownership is set to "ACLs enabled" because Electron Builder requires this setting to successfully upload files. Without it, you will encounter the following error:
"The Bucket does not allow ACLs."
-
Click on "Create bucket".
-
If you don't have an AWS access key and secret key, create them through the IAM service as described in AWS documentation here.
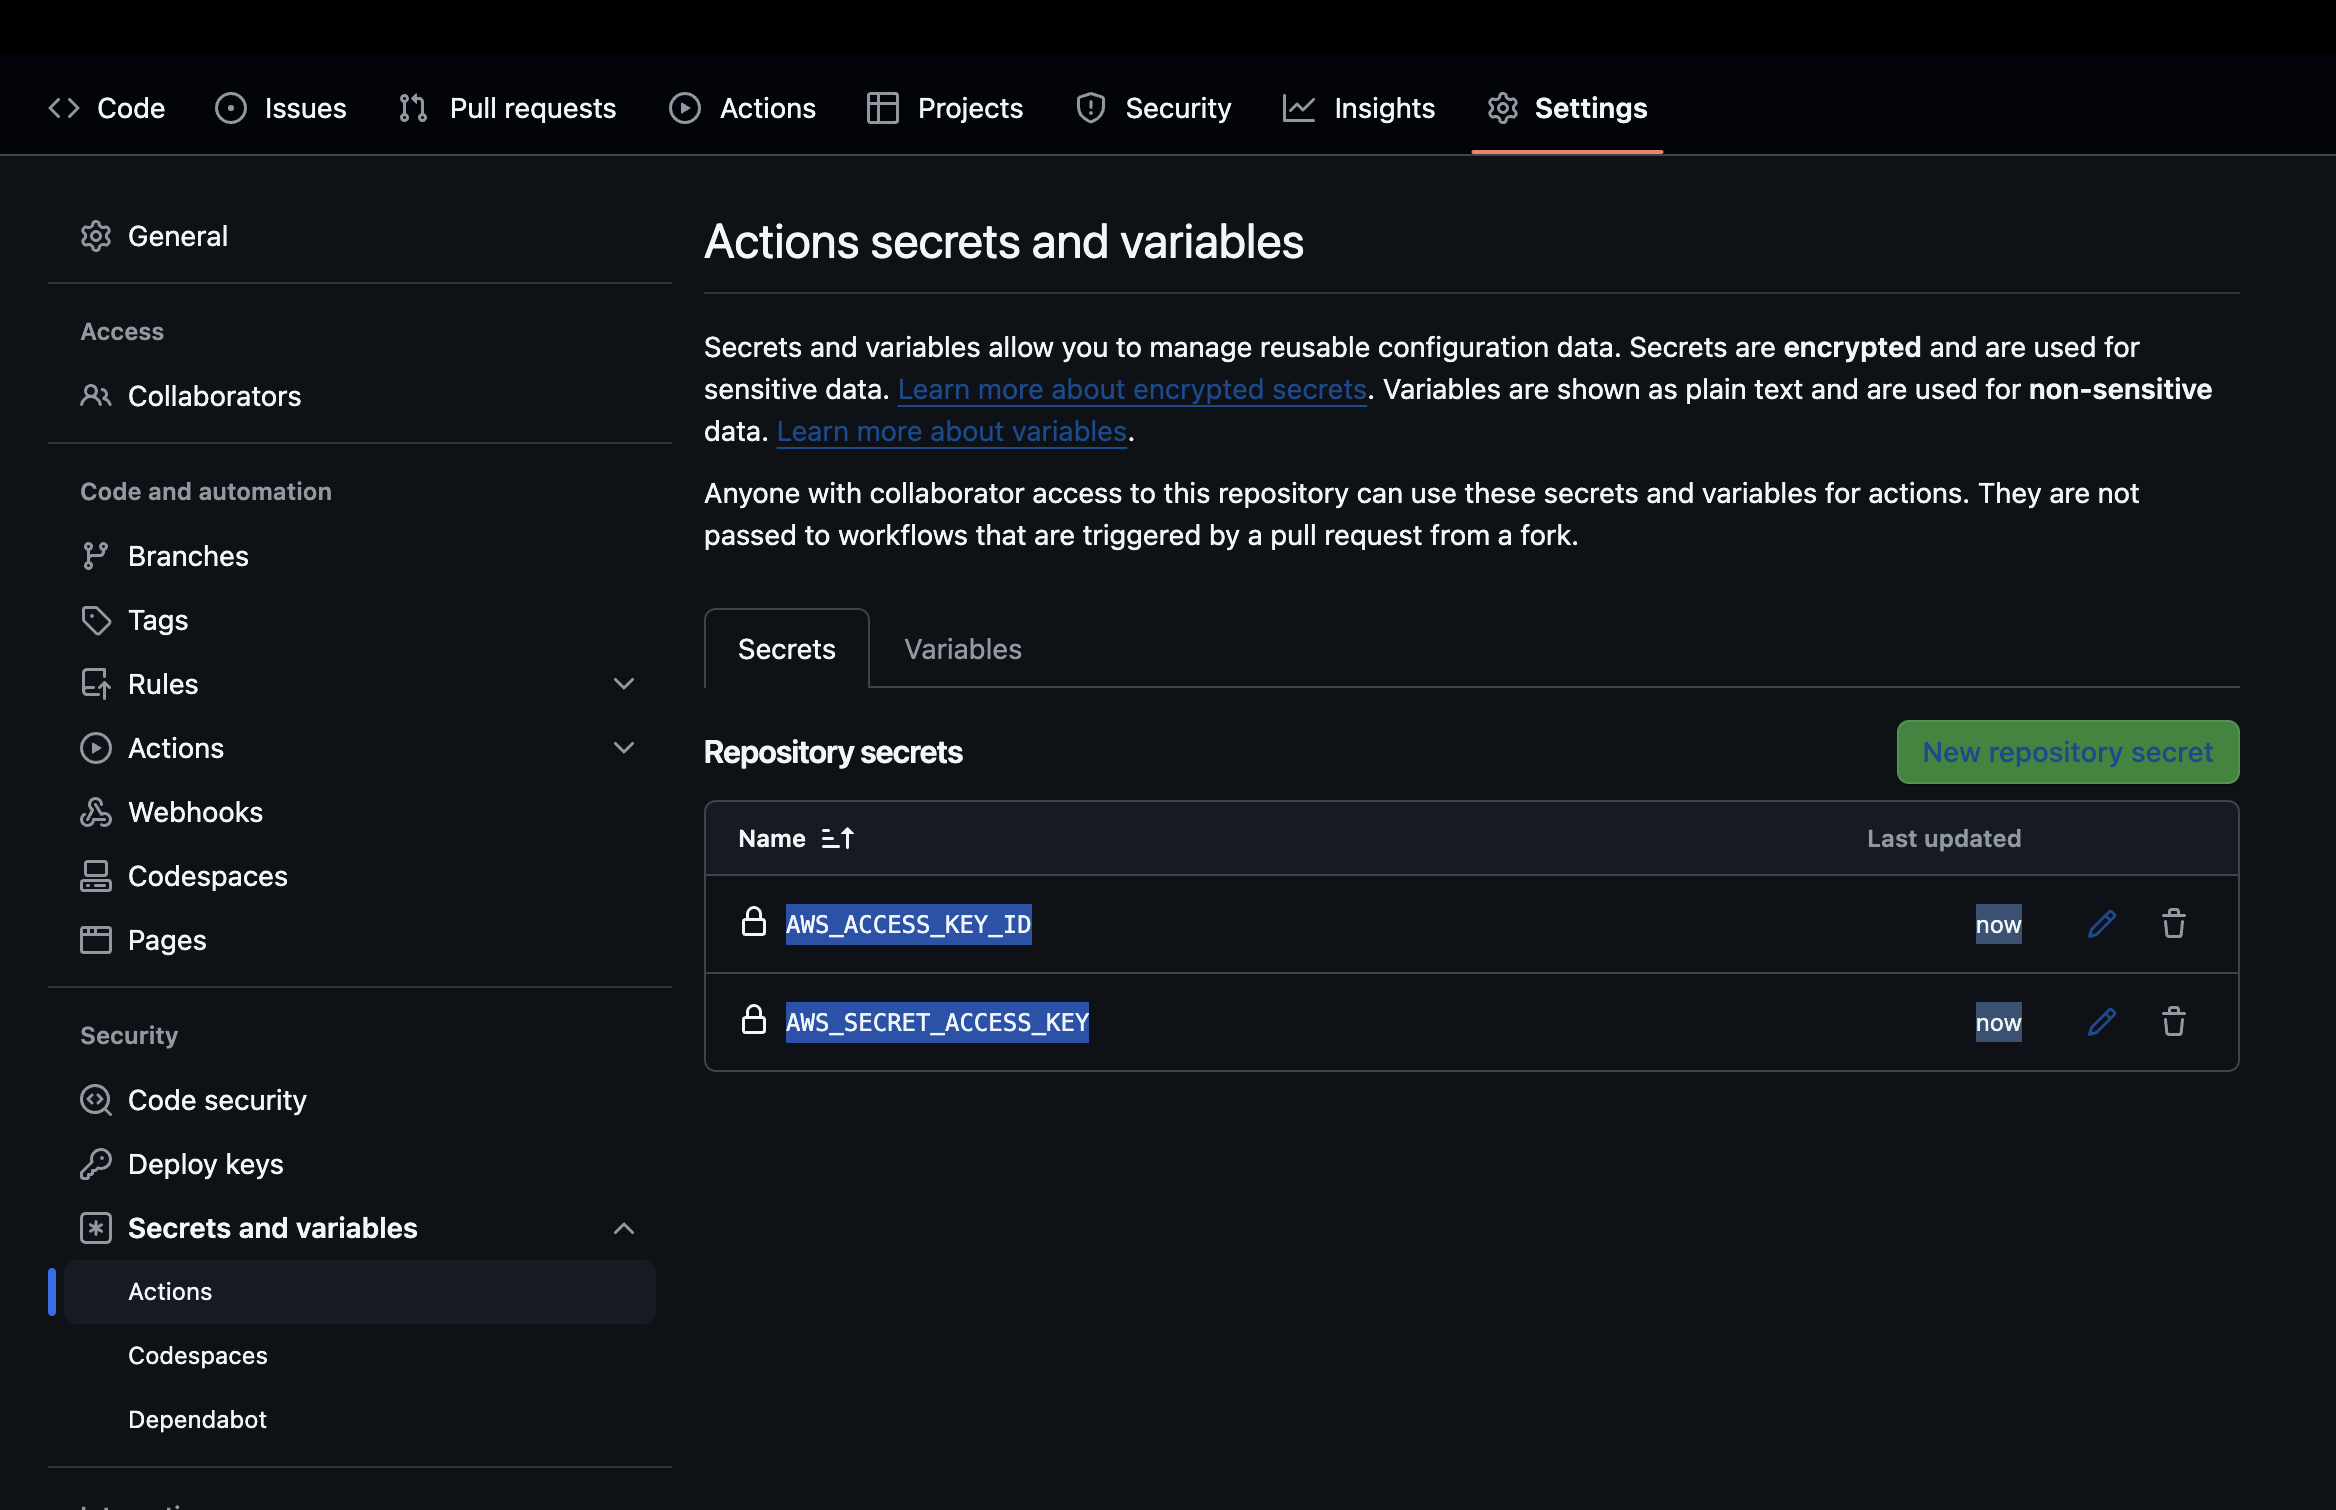
3. Configure GitHub Secrets In your GitHub Repository, navigate to Settings > Secrets and variables > Actions > Repository secrets and add the following secrets:
AWS_ACCESS_KEY_ID            # AWS access key
AWS_SECRET_ACCESS_KEY        # AWS secret key
4. Configure Electron Builder
- In your project's "package.json" file, add the following to the Electron "build" configuration:
"build": {
  "publish": {
    "provider": "s3",
    "bucket": "todo-my-bucket-name"
  }
}
Replace todo-my-bucket-name with the name of your S3 bucket.
5. Deploy
- Push the code to your GitHub repository.
- Go to the repository's "Actions" tab to see the build process in action.
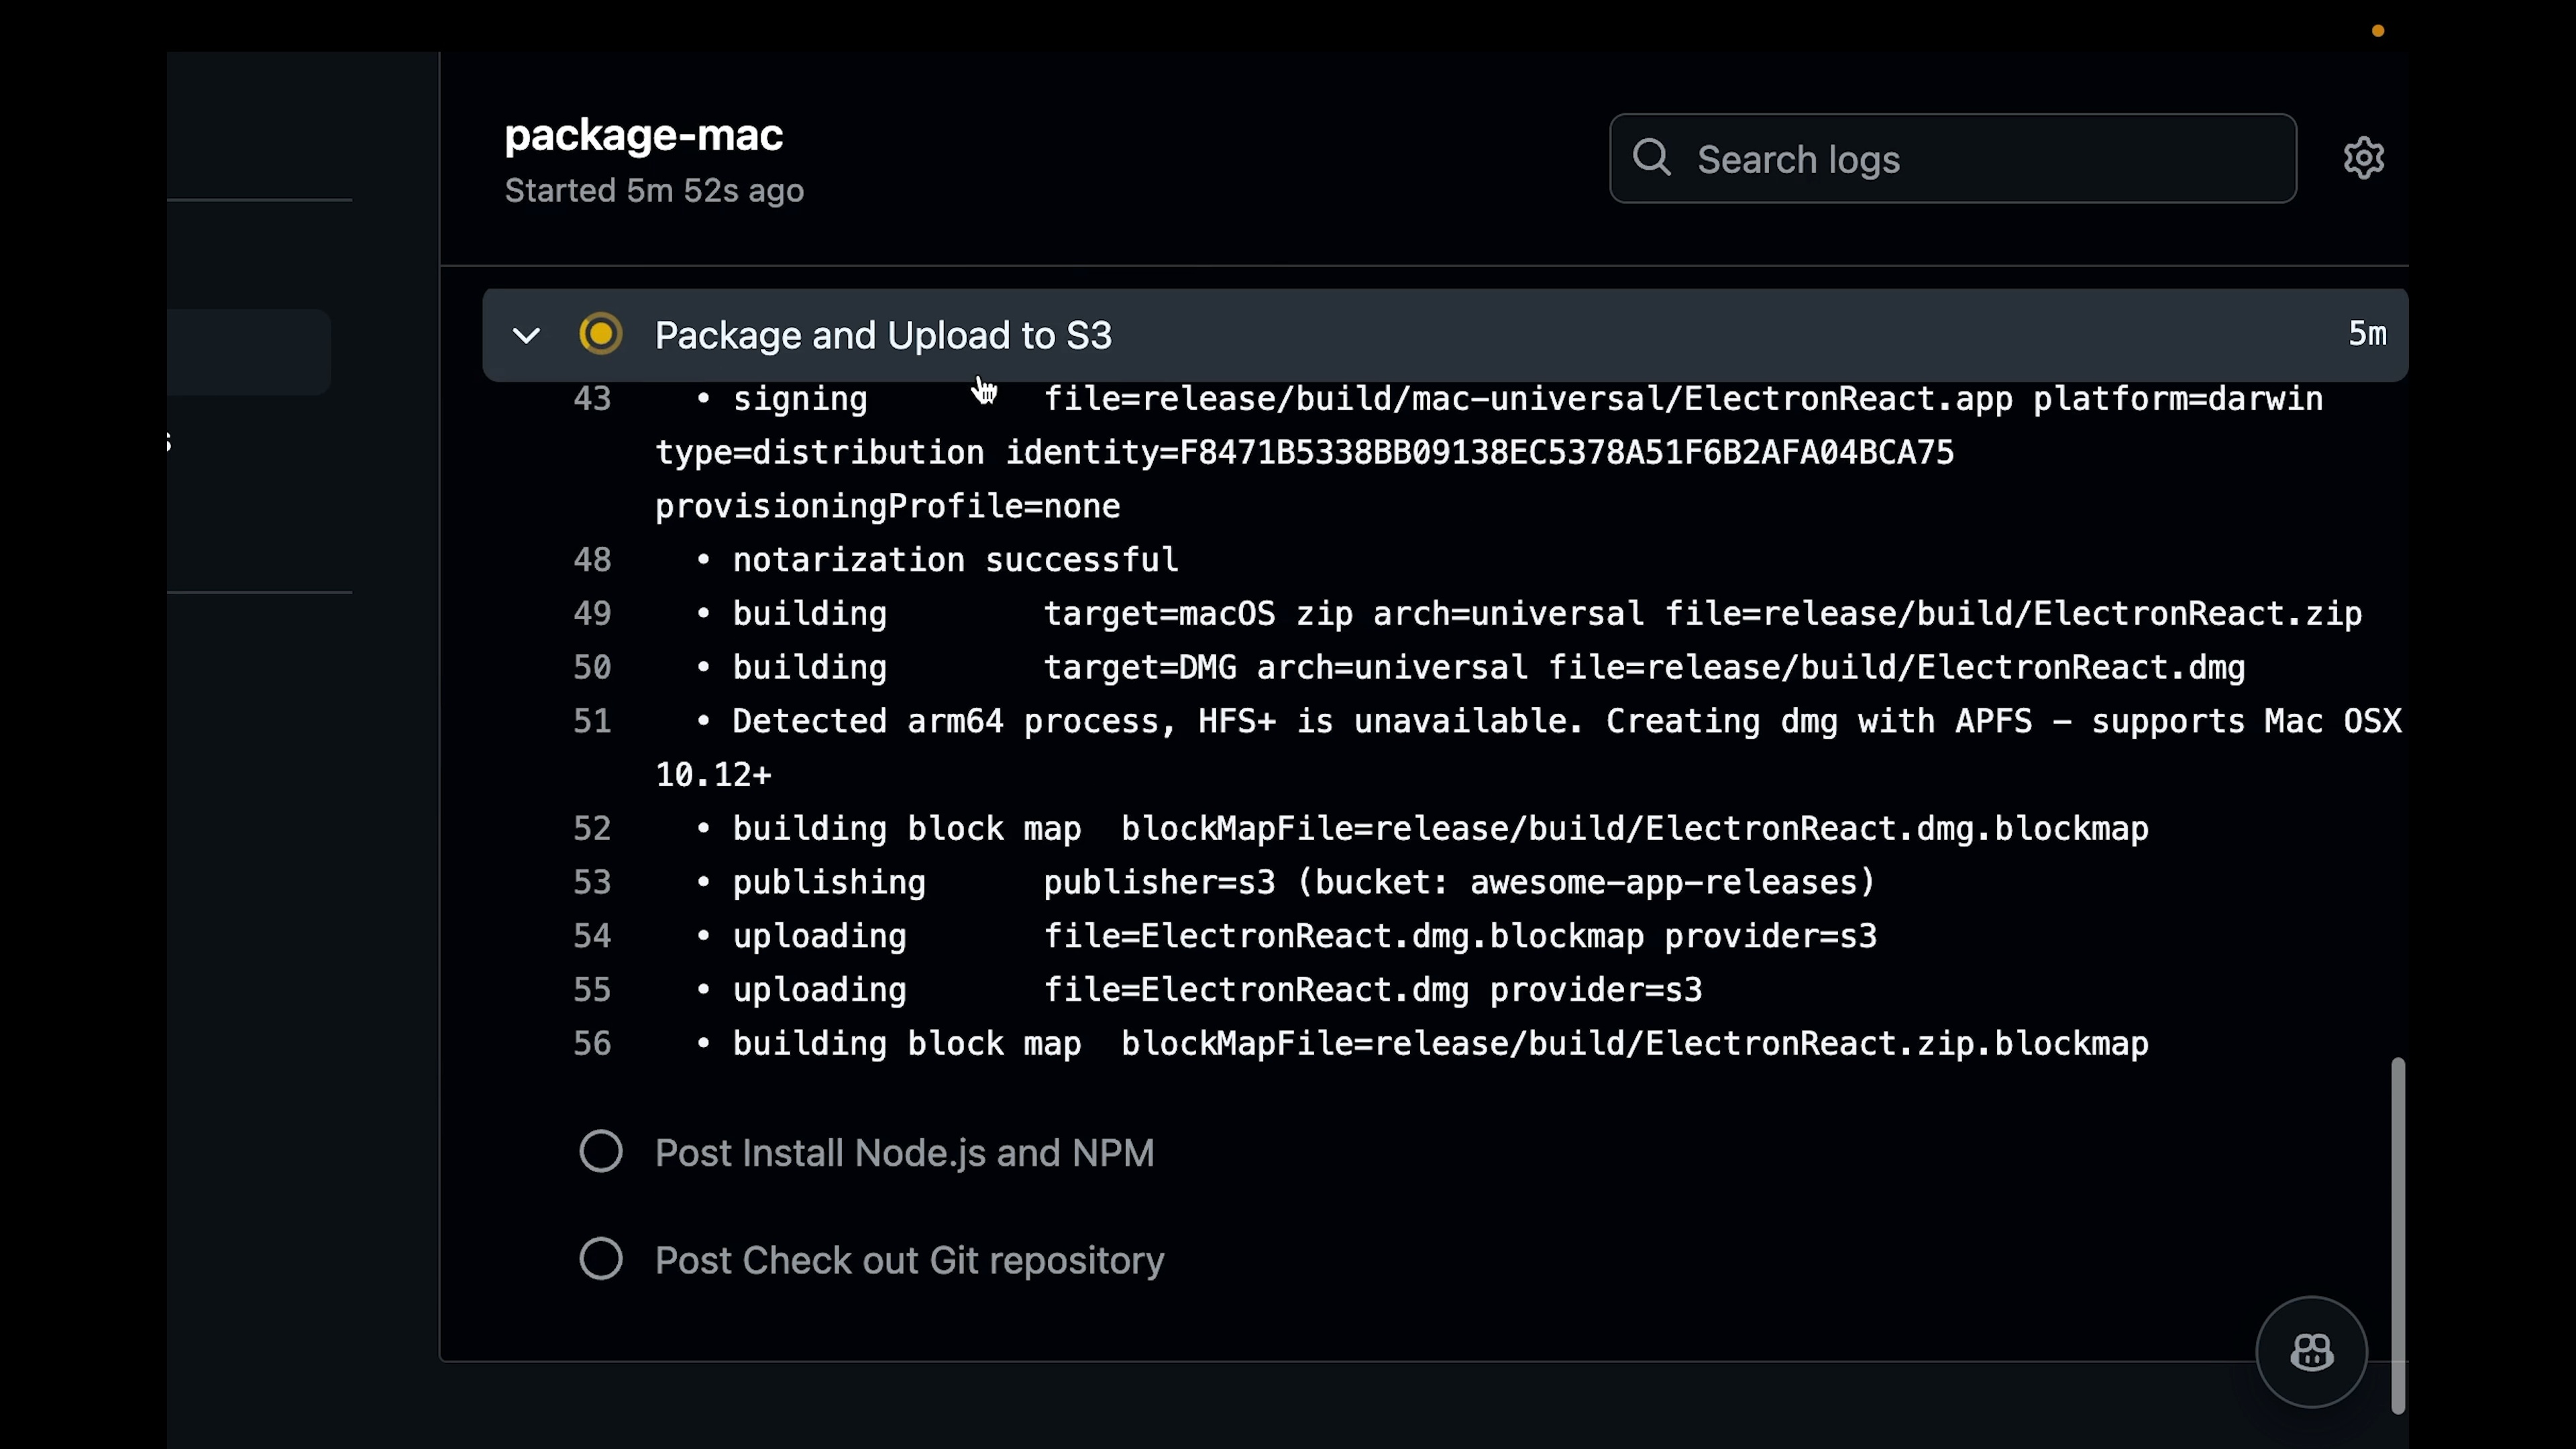
- After a successful build, the installer files will be found in your S3 bucket. These files will be publicly accessible in the following format:
https://<your-bucket-name>.s3.amazonaws.com/<your-product-name>.dmg
Examples:
- https://yahoo-finance-extractor.s3.amazonaws.com/Yahoo+Finance+Extractor.dmg
- https://yahoo-finance-extractor.s3.amazonaws.com/Yahoo+Finance+Extractor.exe
- https://yahoo-finance-extractor.s3.amazonaws.com/Yahoo+Finance+Extractor.deb
- https://yahoo-finance-extractor.s3.amazonaws.com/Yahoo+Finance+Extractor.rpm
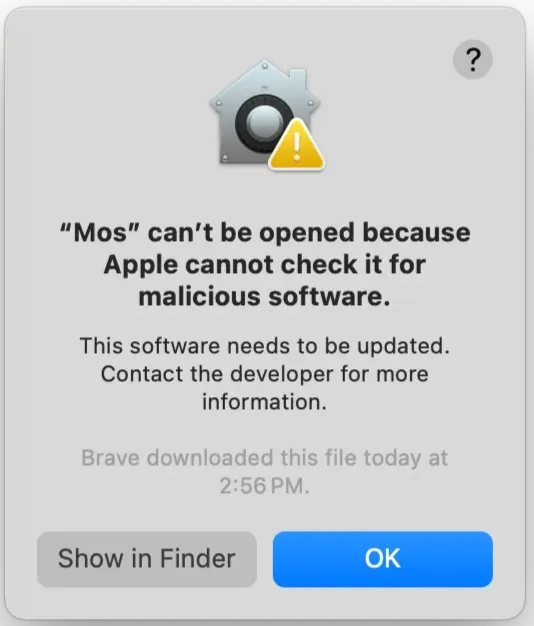
Apple and Microsoft both want to ensure that the apps running on their OS are safe and don't contain any viruses. So they have a process called code signing, in which they will:
- Verify your identity
- Scan your code for any viruses
- Once they are sure that your code is safe, they will sign it with a certificate, which tells the OS that this app is safe to run.
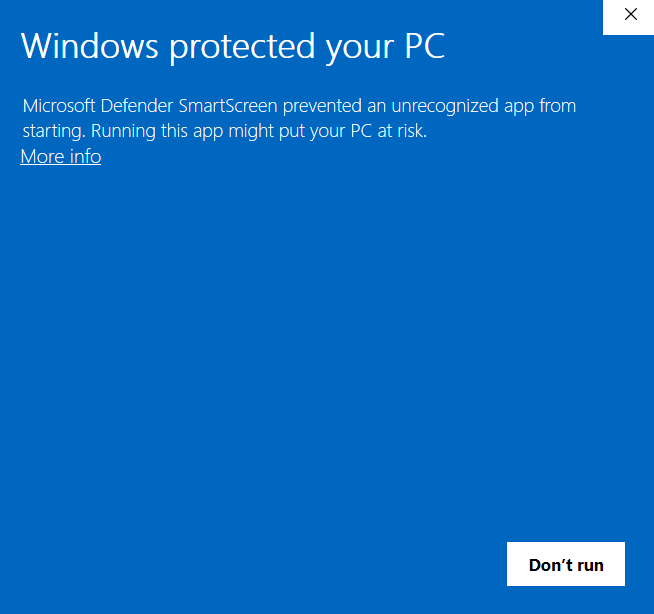
- macOS: Users will not be able to install your app.
- Windows: Users can install your app, but will see a warning popup saying Windows Defender blocked an unknown publisher. To proceed, they must click "More Info" and then select "Run Anyway".
- Linux: There will be no warnings, so users can install and run your app without any issues.
Note: On Mac and Windows, if you build the installer using 'npm run package' and install it on the same machine, you won't see any security popups. However, if you run the unsigned installer on a different PC where it wasn't built (e.g., a friend's PC), security warning popups will appear.
To Code Sign for Mac, you need:
- A system running macOS
- A subscription to the Developer Program by Apple, which costs $99 per year
Once you have those, please watch this YouTube video to learn how to do code signing for Mac:

Coming in 2-3 months.
Yes, you can use the same code signing certificate to sign unlimited apps. For example, you can use it to sign multiple scraping tools.
Code signing is quite expensive. Is there a cost-effective alternative for an early-stage developer?
Yes, it is expensive, and for early-stage developers, it would be financially unwise to invest in a certificate when your app has no users yet.
If you're just starting out, here's a way to launch with minimal upfront costs:
- Temporarily Adjust Your App Download Page as follows:
- For macOS: Do not provide a download link.
- For Windows: Provide the download link, but include a message like this:
"Temporarily, you will see a blue popup from Windows Defender stating that the app is from an unknown publisher. This is because we are not yet a verified publisher. Rest assured, the app is 100% safe. To proceed, click 'More Info' and then 'Run Anyway.' We aim to become a verified publisher soon to resolve this."
- Dedicate your efforts to promoting your app and building a user base.
- Once you have enough users, monetize it.
- After a few months, when your app is generating revenue, you can invest in a code signing certificate and sign your app.
Why this is financially wise?
This strategy allows you to start with minimal upfront costs and only invest in code signing once your app is generating revenue.
Before making your app public, follow these steps to ensure a perfect launch:
Search your project for the following placeholders and update them with your actual values:
| Placeholder | Example Replacement |
|---|---|
todo-my-app-name |
amazon-invoice-pdf-extractor |
Todo My App Name |
Amazon Invoice PDF Extractor |
Todo my app description |
Extract data from Amazon PDFs quickly and accurately. |
todo-my-organization-name |
head-first |
Todo My Organization Name |
Head First |
[email protected] |
[email protected] |
Replace the placeholder icons with your brand assets. These icons are used when creating installers for your app:
assets/icons/16x16.pngassets/icons/24x24.pngassets/icons/32x32.pngassets/icons/48x48.pngassets/icons/64x64.pngassets/icons/96x96.pngassets/icons/128x128.pngassets/icons/256x256.pngassets/icons/512x512.pngassets/icons/1024x1024.pngassets/icon.icnsassets/icon.icoassets/icon.pngpublic/icon-256x256.png
Recommended Workflow to Create Them:
- Use Figma to design your app icon.
- Export your icon from Figma in all the required PNG sizes.
- Generate platform-specific icon formats:
- For macOS, use CloudConvert PNG to ICNS to generate
assets/icon.icns. Upload theassets/icons/1024x1024.pngfile, which is the recommended size for macOS app icons. - For Windows, use FreeConvert PNG to ICO to create
assets/icon.ico. Upload theassets/icons/256x256.pngfile, which is the recommended size for Windows app icons.
- For macOS, use CloudConvert PNG to ICNS to generate
- Replace all the listed files with your new brand assets.
- Save the following icons in a secure location, as you will need them in the future for your organization's LinkedIn, Twitter, or other social media profiles:
assets/icons/256x256.pngassets/icons/512x512.pngassets/icons/1024x1024.png
Alternative Approach: If you don't have a brand icon yet and don't want to invest time in creating one, you can continue using the existing icons (they are professional). This allows you to launch faster with a polished appearance. Once you have users, you can invest time in creating a custom icon.
Run the following command to update the app version:
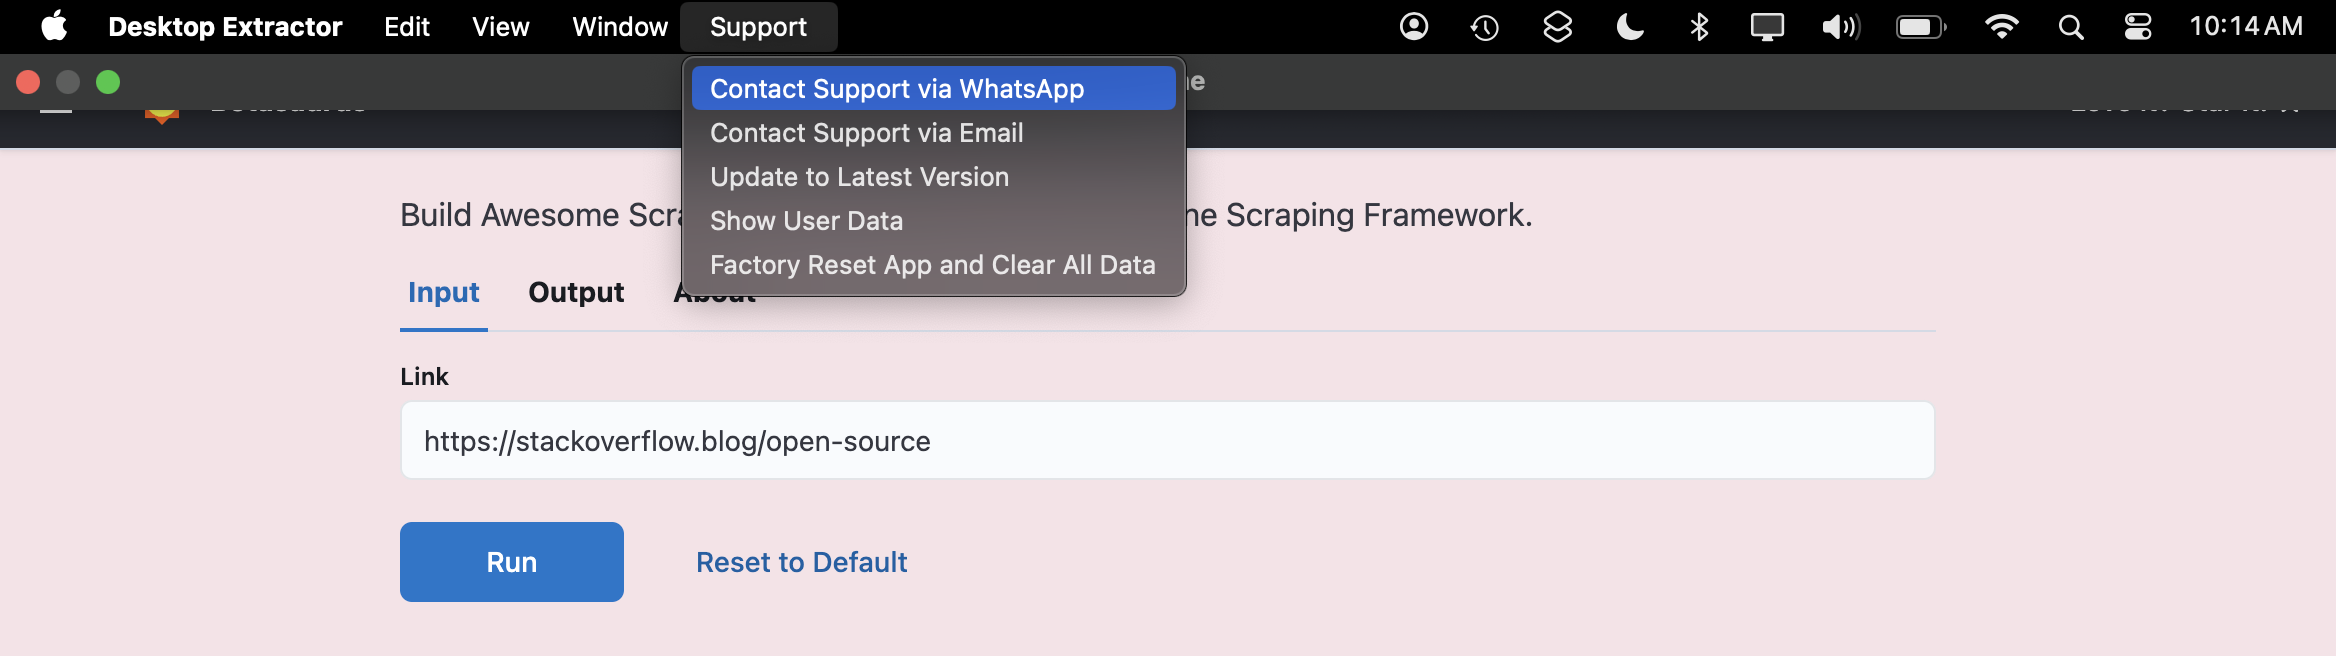
node increment-version.jsProviding customer support will greatly enhance user experience. We recommend adding both WhatsApp and Email support. Based on our experience, customers often prefer WhatsApp over email.
Your support options will appear in the top menu bar of your app:
Adding WhatsApp Support
To enable WhatsApp support, update src/scraper/backend/server.ts with the following code:
import { Server } from 'botasaurus-server/server';
import { config } from '../../main/config';

// Add WhatsApp support details
Server.addWhatsAppSupport({
  number: '1234567890', // Your 10-digit phone number (without the country code)
  countryCallingCode: '81', // Your country calling code (e.g., 81 for Japan, 1 for the US)
  message: `Hi, I need help with using the ${config.productName} Tool`, // Default message for WhatsApp
});
Adding Email Support
Similarly, to enable email support, add the following code to src/scraper/backend/server.ts:
import { Server } from 'botasaurus-server/server';
import { config } from '../../main/config';

// Add Email support details
Server.addEmailSupport({
  email: '[email protected]', // Replace with your support email
  subject: `Help with ${config.productName} Tool`, // Default email subject
  body: `Hi, I need help with using the ${config.productName} Tool`, // Default email body
});
🎉 That's it! You're all set! Now go! 🚀
- Create something amazing that helps people.
- Market it well, so it reaches people.
- Achieve financial freedom and live life on your terms!
Wishing you all the success in life!