Connecting the bot to Discord
-
Steps
- Open your Requestrr Web Portal
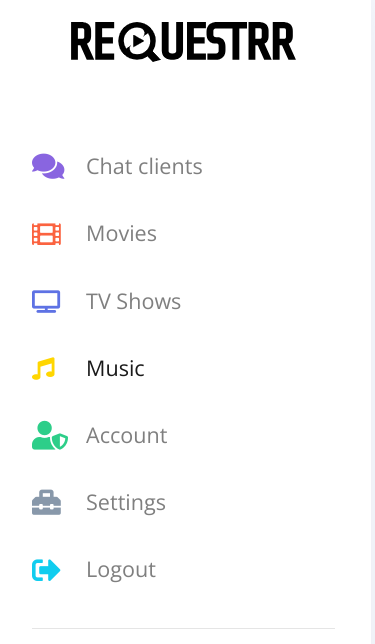
- Click on "Chat Clients"
- Open a new window to the Discord Developer Portal
- Copy the Application ID
- Paste in the Application ID
- Create the bot
- Enable the three "Privileged Gateway Intents"
- Copy the bot token
- Paste in the bot token
- Test Bot Settings
- Click "Save Changes"
- Create your Discord Server
- Copy the invite link
- Go to the copied URL
- Add bot to your server
- Test the bot
- Creating custom language file
#1 Open your Requesterr Web Portal
Open your browser to access the web portal using http://localhost:4545, then login.
Click on the "Chat Clients" menu option on the left-hand side of the page:
#3 Open a new window to the Discord Developer Portal
Keep the Requestrr web portal open and open a new browser window/tab to the Discord Developer Portal, log into your Discord account and create an application:

Once on the new page, enter a name for your bot and give it a icon if you chose to, once your ready, copy the application ID:

Once copied, switch to the Requestrr web portal and paste the ID into the "Application Id" section found here:

Switch back to the developer portal, click "Bot" on the left hand side and click "Add Bot".

Enable the following three "Privileged Gateway Intents" settings:

Scroll back to the top of the page and click the "Copy" button to copy the bots token, if you need to regenerate the token, it can be done here:

Switch back to Requestrrs web portal and paste in the token here:

Click on the "Test Settings" button, if you have done everything correctly, it will let you know your settings are valid as seen here:

If not, then the error message will tell you what to do.
Click on the "Save Changes" button at the bottom of the page to save the work we've done so far.

Now create a new Discord server that you'll invite the bot to, go on Discord and click the "Add a Server" button. If you have already set-up your Discord server, you can skip this step.

Once you finished creating the new Discord server, go back to the Requestrr web portal and click on the "Copy Invite Link"

Paste the URL that you got from the "Copy Invite Link" button in your browser's URL bar.
If the button doesn't work, you can manually make the link yourself: https://discord.com/api/oauth2/authorize?client_id=YOURAPPLICATIONID&permissions=522304&scope=bot%20applications.commands
Simply replace YOURAPPLICATIONID by the application id we made earlier.
If you instead choose to make your own link via the Discord Developer Portal make sure to give the bot the following permissions:
    Read Messages
    Embed Links
    Read Message History
    Use External Emojis
    Send Messages
    Manage Messages
    Mention @everyone
    Add Reactions
Once the link opens, simply choose the discord server you created earlier to invite the bot into it:

Now that the bot has joined your server, it's time to test the bot.
Type / in the chat and you should see a list of commands pop up, select /ping and press enter, and the bot should reply Pong
You're now ready to go back to the web portal and do the rest of the configuration in the TV Shows and Movie pages.
Requestrr supports custom language files, these files need to be created and added to the locales folder. Once done, the file will need to be selected in the "Chat clients" section.
To start, make a copy of a current lanaguage file located in the locales folder or here. Rename this copy to an appropriate name, then edit this file (using Notepad, VSCode, etc). Make sure to only change the the text on the right-hand side and maintain the JSON struction. See an example bellow:
{
....
  "Discord.Command.Movie.Request.Title.Name": "text-for-requesting-movie",
  "Discord.Command.Movie.Request.Title.Description": "Test used for the description when requesting a movie",
....
}
If you are using docker, you will need to insert the new language file into the locales folder, this can be done with like the following example.
Assuming you have the follow folder setup for your Requestrr
/opt/Requestrr/ and in this folder, you have:
./config
./example.json
Resetup your docker container with an extra volumn:
-v /opt/Requestrr/example.json:/root/locales/example.json
Full example:
docker run -d
    -v /opt/Requestrr/config:/root/config
    -v /opt/Requestrr/example.json:/root/locales/example.json
    -p 4545:4545
    --restart=unless-stopped
    thomst08/requestrr
Caution: Using a custom langauge file is supported, however, your custom file will need contain all the most most recent propities from the your current build, if any propities is missing, this can result in an error when running Requestrr.